Saturday, December 24, 2011

All with the help of my elves!

     Well, we finished the Christmas card on Thurs. and I finally found a moment to post it :- ) I have to give the credit to my DH elf for cutting the scallop from Recollections paper with the large nestabilities die (as well as scoring and folding all 40 cards, following through on the tree decorating when it stalled and signing all the cards.) My DS elf embossed the snowflakes and corner rounded the sentiment, as well as spraying the image with Crafter's Companion Spray & Sparkle Iridescent glitter varnish (gotta love him ;- ) The image and the sentiment are both from Meljen Designs and were colored in Photoshop. The pattern paper is a digital paper from Bits and Bobs and is part of a free sampler. I'm giving you the direct link to the free sampler I used, but here is a warning: I found the sampler from a direct link and when looking for it, for this post I found that this site does have kits that link to adult content (there is a warning), so you might want to be prepared or just go to the direct link, if you are interested in the paper and the matching embellishments. So you've been warned!

  
     I didn't take a photo of all 40, because there was no place to set them all up ;- ) At this point, I decided to diverge from my usual path, and just stamp on the inside with out adding any other paper (need to be quicker and simpler.) The sentiments are from Clear Dollar Stamps's Christmas Blessings and were embossed with holographic embossing powder. Now here are some stamping tips:
1) You will get ink on your fingers every time you touch the stamp block or stamp pad
2) Ink that doesn't wipe off will always come off on white cardstock when you touch it  >.<
3) you should totally wash your hands with soap & water and wipe the stamps every 4-5 cards (not      really moving fast, but very important!
4) A damp cloth to wipe your fingers with after touching the stamp &/or stamp pad will keep down finger smudges on your cards
5) ink smudges are a naturally occurring phenomenon on cards and only add to the beauty and value of your card (just like those tags on clothes)
6) forget perfectionism or you will never finish ;- )


     Yes, of course, I showed you the best one. I'll be entering this in Stamping With the Dragon's challenge which has anything to do with snow. Thanks for coming by. I hope you and your family have the most Blessed of Christmases. Please leave a comment before you go. I really love to hear from you!

Thursday, December 22, 2011

Great freebie ;- )

     Just dropped in to let you know that SVG Cuts has a great freebie available until the 28th.  It is a set of SVG's to make these adorable 1-sheet boxes.


    So, if you have an electronic cutting machine that uses SVG's or if you have Sure Cuts A Lot, head on over there. You can use the affiliate link on my sidebar.  Correction, I remembered when we were out today, that the link on my sidebar is for Sure Cuts A Lot. Here is the link to SVG Cuts. com. The closeness of Christmas is beginning to mess with my mind, ha ha. Mary also has a video showing how to assemble 2 of them.

     Should have my Christmas cards done and ready to post soon, very soon. Thanks for stopping by ;- )

Saturday, December 17, 2011

Elves have been sighted ;- )

     Elves have been getting busy. One is working on the tree and the college elf has been spraying glitter for the Christmas cards and has learned to use a corner rounder ;- ) Amazing growth, that college brings, ha ha. However, today's item, is still not our Christmas card. Instead, it is a square tag that I made using the image from the Freebie Challenge at The Outlaws due, surprise, today!

     The image is from Anne's Digital Design by Anne Fenton. You can find her blog here, where she often offers some great freebies. I colored it digitally in PhotoShop. The red cardstock is from Core'dinattions and the pattern paper is from DCWV Holiday Christmas Stack. I just happened to pick up the ribbon this week from Michael's this week, on sale. The sentiment is from Inkadinkado and I embossed it with Kaleidoscope embossing powder.  I went over the sign with a glitter gel pen and added Diamond Glaze to the berries (it appears it's not dry >.<) A nice, very simple tag, where you can put the To: and From: info on the back.


     I'd like to go back to cutting down our tree next year. Just shopping for it, as we have the past couple of years (partly due to the surgeries) causes us to go out for it later and the pickings are slimmer and I don't get to enjoy looking at it as much.  Hope your holiday preparations are coming along on schedule. Thanks for taking the time to stop by. Please leave a comment before you dash off. I really appreciate them. Have a holly, jolly weekend ;- )

Wednesday, December 14, 2011

Still no elves in sight, but here is a card ;- )

     Today's card uses the image for the Progressive Challenge at the Crafter's Digital Art Center. The image is by Doodle Pantry.  I colored it digitally in PhotoShop. I've been thinking I will do a tutorial on coloring images in PhotoShop some time soon. Maybe after the holidays, if people are interested ;- ) The font I used for the sentiment is LD Leaves from Lettering Delights. I have an affiliate link to their site on the side bar to the right. I plan on completing the card as a gift card holder inside, as soon as I decide to whom it is going and have purchased the gift card. The papers are DCWV's Lemon Flower Stack. Love the glittery paper in this stack ;- ) The flower in her hair, is a button I picked up at JoAnn's.


     Well, this is a short one because I, like all of you, am busy with Christmas stuff and am trying to make Christmas cards (a first time for me and... HAPPY DANCE... my son finish his finals tomorrow, so is coming home from college, Yipppeee!

     Thanks for flying by during all you holiday preparations. Please leave a comment before you go, they really mean so much to me. Have a super creative rest of the week!

Friday, December 9, 2011

14 tags and the Cookies are on the Way for Finals! Also Freebie links!

     Well, you're probably wondering were I've been. the party's over and no word from me. I did also have a birthday this week and then I heard then some of my college students were on their way home this weekend!!! Yikes! The cookies haven't gone out, what is happening with this thing called time? Now I don't know what is happen to the college system, but it seems some of them just had to write mostly papers, instead of actually taking finals. What's with that. Don't they know it takes me time to make the 14 tags and mail the cookies? It takes days just to go over all of the possibilities of things that could be used on a tag!

     I finally narrowed it down to cutting the front of the tag with the Cricut's Christmas Cheer cartridge using the Joy tag. I used Design Studio to size it and lay it out with 3 tags on an 8 1/2 by 11 sheet of cardstock. Seemed like a good idea, until I went to cut the solid back and Design Studio can't hide the cuts (contours) of the word JOY to make a solid tag, so I had to do the backs with the Gypsy and due to the way the one program allows you to do the size verses the other, the backs are just a bit smaller. Should have used the Gypsy for both parts. The Baby Jesus in the manger is an SVG purchased from Svgcuts.com and is part of the set O Holy Night and cut it with Sure Cuts A Lot. You can find the link on my sidebar. The sentiment is a digital image from Meljen's Designs that I got as a freebie. You can find her images here. She usually has freebies on Mondays. The red paper is a digital paper freebie from Papercraft Inspirations Issue 94 (online). Go here and the click downloads to check out all of their goodies ;- ) Are you beginning to see a bit of a trend, ha ha. I love freebies! The green paper, between the front and back tag is from Sue at PSP Crafting Gallery. You can find her freebies and those of some others here.  The final freebie is the ticket, which is a Member freebie (membership is free), from Crafter's Companion on the UK site, here. It's part of the Nov. set.  The digital freebies include papers, digital ribbons, tags, buttons and other elements all designed to go together. There is a new set every month. Most of the tag was embossed with Sizzix's Snowflake folder from the Christmas set (thanks hubby for helping out!) Yes, my DH know how to run the Big Kick ;- ) Everything was inked with distress inks to make them pop a bit and there is glitter pen and white gel pen on the holly berries.


     On the back, the gold metallic embossed sentiment is from Hero Arts and the rest is inked with Fired Brick distress ink.  The ribbon is from Michaels.


And here they are with their cookies, waiting to get boxed up.

     Here are a couple of photos of the food from our party. We did it mostly potluck this year for the first time. Yummy!


And finally, this is what you might have taken home if you participated in our White Elephant ;- )

     Thanks for dropping by and making all the way through the post ;- ) Have a wonderful weekend and please leave a comment before you go. They really mean so much to  me!

Saturday, December 3, 2011

Tag, you're it ;- )

     Well, for the Creative Freebie Challenge at The Outlawz, I decided to due another tag, especially with the Christmas Party being tomorrow. It would have been done yesterday, except for needing to let the glitter glue dry. Then today, a piece went missing :- p Kind of figures, doesn't it ;- ) So after searching for way too long, I remembered that the DCWV Christmas Stack (which all of the papers are from) has another sheet with the element on it and just re-did it. The image is from Sandi Huggett and you can find Sandi's work at Sandi's Samples here. I used Diamond Stickles on the candy canes, Sparkly Fluff on the top, heel and toe of the stocking,  Perfect Pearls on the body of the stocking. I applied a line of Crayola Pip Squeak glitter on the line between the  papers and glitter gel pen to the gift box that was cut out from the DCWV paper. There is also white gel pen added to the NOEL. The stocking image was printed twice and popped up. I'm not sure whose the holographic snowflakes are, because the company name is cut off of the package > . >


     I was out decorating for the birds, ha ha ;- ) and ... 


     The sun is setting way, way to early and it's way to far south :- ( 


     Well, back to work for me. Thanks for dropping in. Drop in over at the Outlawz and join the next round of the Freebie Challenge. Check it out here. Please leave a comment before you go. It means so much to me to hear from you ;- ) Have a wonderful weekend!

Monday, November 28, 2011

I think I'm ahead, only to find I'm behind ;- (

     I started out thinking I was doing so well. I had finished a tag for the Progressive Challenge at Crafter's Digital Art Center on Saturday, but it was dark when I took the photo and I never got one taken on Sunday and by the time we got back from taking my son back to college, I was too tired to post, so I just figured I re-take the photo during the day today. Still, it isn't due until the 30th and I was done on the 26th and could have gotten it there if I had to. Such an accomplishment. That along with finishing my Aunt's card, mailing her gift and working like crazy on the house, because we have a huge Christmas party coming up on Sat. and my hubby is still recuperating and can't lift over 15 lbs. (How heavy are your Christmas boxes? Mine are a lot heavier than 15 lbs.) Now, I know my neighbor just had a death in the family and that will be 3 cards to make, but I have a bit of a grace period on that, so I think I'm doing pretty good and then.... I remember, just before writing this, that today is the anniversary of some dear friends of ours, so dear that they are coming all the way from Kansas to the Christmas party (Kansas City to Chicago is a looonnng way for 1 evening's visit.) Not only that, tomorrow is another friend's daughter's birthday. I didn't miss the birthdays of either of her sisters :-0 Wait .... what happened, everything was going so well? Maybe this is why the tag is done early!!! and my house is partial decorated!!! and my family room has been dusted!!!

     The tag uses an image by Tracy from Sugar Creek Hollow and the challenge and info on it can be found here. She reminded me of a partridge. I colored her digitally and printed her twice, cutting off her tail, legs and top feathers for the top image. The top image was edged with Zig Gold Painty marker and  sprayed with Crafter's Companion's Iridescent spray, which of course doesn't photograph well. The tail and top feathers on the bottom layer are actually inked with Distress Inks. I hadn't colored them because I didn't know I was going to cut it out like that until I did ;- ) The pattern papers are both freebie papers from Papercraft Inspirations. They have lots of great freebies. check out there site here. The tree came from issue 91 and is called Crafty Orchard and the music paper is from issue 93 and is All Join In. The golden yellow cardstock is Core'dinations and it was embossed with Birds and Swirls by Cuttlebug. The sentiment is from Clear Dollar Stamps and was sprayed with Yellow Daisy Glimmer Mist. My favorite part is the ribbon, which you can barely see. It's very shimmery and silky. I was inspired to do a tag by Sue at http://scrumplescrunch.blogspot.com/ who was doing the 12 tags of Christmas Challenge. Now she is in a class way beyond me, but that's where inspiration comes from ;- )


     Now on to my Aunt's card. I'll re-fresh your memory with the outside photo, but you can go here for the info on it. I just wanted to show you how I finished off the inside.


     The stamped and embossed image at the top is actually an unmounted stamp. I wanted to give a tip that to use one, that you hadn't gotten around to mounting (I'm not sure that ever has happened to anyone ;- ), but you can use re-possionable adhesive on the mounting block to attach the stamp. That stamp was a gift with purchase and isn't marked so I don't know whose it is. The Happy Birthday is from Scrappy Cat. After I took the picture, I added a gift stamped with blue chalk ink in the huge white space. The gingerbread men were colored over with a glitter gel pen.

     And finally, (I know you thought this would go on forever and it's not over yet) here are a few photos of the gift I sent my Aunt. We found this at a craft fair in Sept.  and this artist had so many lovely pieces in a huge variety of sizes. This is made of clay and the petals are very soft. 


      Thanks for making it through today's post. I'm sure you  have so much to do too ;- ) If you have any time left, please leave a comment. It means so very much to me to know you were here. Have a great week and remember to do something creative that you enjoy!  

Saturday, November 19, 2011

Creative Freebie Challenge at The Outlawz

     Well, here I am at another deadline, only this time I have no clue where the time went. I really love the images that we were given and I'm feeling bad that I just remembered today that it's the 19th, because I wanted to send more time with whichever image I chose. You know, do it's wonderfulness some justice.  I had planned on coloring it non-digitally, but with the short time, digital it is. I used a pattern on the top of the stocking to give it a more fuzzy feel. The wonderful image is by Sandi Huggett.  The papers are from K &Companies Peppermint Twist Specialty papers from last Christmas and some cream cardstock I had on hand which was embossed with snowflakes from the Sizzix Christmas folder set from last year.  The top of the stocking is stamped with a stamp by Inkadinkadoo from Christmas Wishes and embossed with Kaleidoscope powder. The inside of the card is unfinished, because I'm not sure who I'm going to send it to or if it will be a birthday card. I embellished the pink border snowflakes with Viva Decor Pearl pens. Sorry, for the poor quality on the photo, but I ran out of daylight :- (  You should come and join us at The Outlawz!


     I also went to Archiver on Fri, before going to get my son from college, and made their Make-N-Take.  I ended up rushing home, hoping that I wouldn't get all of the glitter all over the car >. > then the photo ornament might show my photo at my memorial service, if my hubby found red glitter glue all over the seats. Ha Ha! Here is a photo of the tag. Of course, every time I touched them, I had glitter glue on me!


    The photo ornament photo didn't turn out well, so I'll try to re-take it and post it another time (must have been all of the glitter.)  Thanks for stopping by and please, leave a comment before you move on. I really love to hear from you. Have a blessed Sunday!

Thursday, November 17, 2011

New Progressive Challenge has started.

     I don't have a new card to post today. I just wanted to let you know that Crafter's Digital Art Center has started a new Progressive Challenge. You start with free digi images and as long as you submit your project before the deadline (2 weeks), you get the next set free. If you participate in all of the challenges, you are entered to win the Grand Prize. The prize for this series is over 100 rubber and clear stamps, including stamp blocks.  Click here to go to the Challenge page and see the images, rules and to sign up. You need to be a member of CDAC to play, but joining is free. So come join the fun. There are even some surprises thrown in along the way ;- )

     Tomorrow, we go and get my son from college for Thanksgiving Break, yipee! So you know I won't have a card to post then either, sorry, ok I'm not really that sorry. I'm working on some Christmas decorations using svg's and hope to have things to show soon though. I may get to Archiver to do their Make-N-Take and then there is always that to show, ha ha. Have a great and wonder-filled weekend!

Monday, November 14, 2011

2 Guy Cards in One Day, Whoa!

     If you read the title, I know, I can't believe it either! The first one is for the friend I've known since 2nd grade, her son's birthday. I designed the shaped card on the online Cricut Craftroom, last night (after finally getting it to accept my login - the same one I used each and every time >.< .) The cartridge is Stretch Your Imagination. The pattern paper is Paper Studio from Hobby Lobby (40% off right now.) I cut his name using  the Plantin Schoolbook cartridge and my gypsy to weld it. The rest of the sentiment is a die from Sizzix called Birthday Wishes. I cut it once in yellow and then blue, hoping the peeks of yellow would help the blue stand out more and make it a bit festive to go with the confetti. I used my xyron to glue them together and LetraTac to glue them down.  It appears I forgot to take a photo of the inside this time.


     The second card, is the creation using the image for the progressive challenge at Crafters Digital Art Center . We are on round six and the image I used this time is from Elephantastic. I thought this image would be perfect for my neighbor's birthday. He has his pilot's license. I colored the image in PhotoShop and used some patterns on the bear and his leather jacket. This pattern paper is also from Paper Studio and is available at Hobby Lobby (can you guess where I went today ;- ) ? The dark red is from DCWV paper pack. I planned on inking the image which was cut with my nesties, but today seemed to be one of those days when inking just wasn't going well. I had tried it twice and thought about not letting it beat me, ha! but then I decided to surrender and not get frustrated, just move on.


     Thanks to Carolina girl, for helping me deal with the visuals of making a easel card where just the image pops out, I decided to make this an easel card. The balloons are stickers from Jolee and you can find them at Walmart. I trimmed them where they went off of the bottom of the card. The inside isn't complete, because John's birthday isn't actually until March, so I'm not sure what I may want to say then. Looking at the photos of the card here, I will probably go back and add some some puffy paint to the fur collar of his coat and maybe some Sparkly Fluff to the bear fur. I had also meant to add some shine or metallic to the propellers and forgot. The luxury of not being behind on mailing something. Though I have to post this today for the progressive challenge ;- ) I often see things when I look at the photos here, that I didn't think of when I was making the card. It's that stepping back, that I don't usually have time to do in my studio.

This is also entered at Robyn's Fetish challenge here.
     Thanks for stopping by today and peeking at my cards. Hope they gave you some that ideas you can use. Please leave a comment before you fly on, because I really love to hear from you. Have an inspired week.

We're off the Hook

     Today's card is for my friend's, whose birthday card was posted the post before last, her middle daughter's birthday, who was 27 on Sunday. Due to the Veteran's Day holiday there was no mail and the card was going to be late, rats! I decided to go with the telephone card from the Cricut cartridge, Wild Card called Hello ' cuz phones just seemed appropriate (it's so hard for me to stop thinking of her girls as teens, Yikes! though I know they aren't any more.)   All of the cuts are from the the cartridge. except for the little piece that stops the dial, when you are dialing. I free hand cut that from a metallic scrap. The phone itself was cut twice (I used the gypsy so I could position the second image with the card part of the cut hanging off of the mat, so it would just cut the handset - you could have just placed you paper that way basically.) I popped up the handset of the second cut and also the dial. I used a clear glitter pen to write all of the numbers except for the 2 and 7 which I wrote in red glitter pen, since that is her age. There is a sentiment cut that says "Talk of the Town," so I adapted that by writing it in white gel pen on the handset. There is a hole in the center of the dial when it cuts, that goes through to the inside. I lined up my sentiment to have a stamped heart show through (lining this up  in the sentiment was the hardest part.) I used ribbon wrapped around a pencil and stiffened with Mod Podge for the telephone cord.


     The paper on the inside is fro Paper Studio. The shape of the sentiment had to accommodate the shape of the phone. The fonts are LD Typeset and LD Wedding from Lettering Delights. I have an affiliate link on the side bar of my blog that will take you to their site.


     For those of us who are older and curious, the phrase "off the hook" means fresh, new.  I like to be educational ;- ) I'm not sure how I knew that, but it's some of the trivia that fills up my limited brain capacity and keeps me from knowing important things, like what I did last week and important words that I need when I speak.

I also threw together (and that's pretty literally the truth) a few thank-you, for the people that covered for us, with the teens and brought meals, after my husband came home from the hospital. They're so not works of art, but I will show them because I think they will inspire your creativity, in that, you just need scraps and you can do "quickie" Thank-yous, though, you might want to make them a bit nicer than mine. They are about 3 by 3 1/2 or so, though it depended on the scraps I worked with.


This used a piece of punched border that mis-punched, but I kept and trimmed the good part.


This was for our friend first, Pastor second (it's a second career for him and our sons went to school together.) He covered the last hour of my teens (his twin girls are 2 of them) and of course visited at the hospital.


This was the inside. The stamps are from Clear Dollar stamps, Church Chatter.


Again, just simple with tone on tone background stamps, an accent stamp, sentiment and scraps.


Wonderful sentiments from Clear Dollar Stamps. They are having a sale (40% off until the 19th.) I get nothing for this ad ;- ) And why was I rushing so? because I had to get ready for my 11 hours of cookie baking at a friends. Whew! That's a lot of baking. Here's a few photos to make you hungry.


     Hope your week and your creativity is really off the hook ;- ) Thanks for coming by and please leave a comment. They really do make my day or night.

Friday, November 11, 2011

Birthday Wish for a Guy

     This is one of those cards, that looked better in my head, then it did when I was done >.< Probably, because in my head, I haven't chosen the papers, just the idea. Both the card base and the sentiment were cut from Cricut's Birthday Bash cartridge.  I embossed the background with Cuttlebug's Christmas Stars and used My Mind's Eye twine. I popped up the DP, which is from Paper Studio and popped up the sentiment on it. The DP is edged with a gold paint pen. This card is for my son's best friend in middle school, who is at a different college than my son. He has a great (though sometimes quirky) sense of humor and wouldn't be demanding of the looks of the card, fortunately ;- )


     No time for second guessing the front, so moving on.  The font in the multiple choice section and the Happy Birthday is Bevan (all can be found on the internet, try a google search), the one in the parenthesis is Beetle and the one in the salutation is Black Jack. The boxes and the check mark were made in Print Shop. Matt will enjoy the humor.


     I didn't get much done on the next card. First I found out I couldn't get it into the mail tomorrow anyway, because of Veterans' Day (there is no mail.) Then I needed to shop for baking ingredients, because a friend and I are doing MAJOR cookie baking all day Saturday for my Christmas Party and just for the holidays for her. It took longer than I would have thought, as DH and I stopped to eat and I looked for some wire for the next card too. Some of these cookies will probably even find there way into a shipment to the college students. So, I'll need to really move it on that next card and make up some of the doughs that need to chill overnight.

     Thanks for shooting by. Please leave a comment, because they keep me motivated and mean so much to me ;- ) Have a blessed weekend!

Wednesday, November 9, 2011

Popping In birthday card

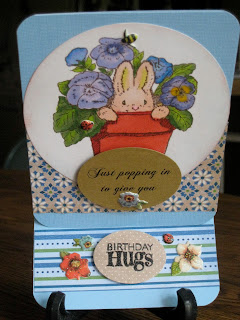
     Today's card is for one of my dearest friend's and the Matron of Honor at my wedding. That great friend I dissed back in Sept. on her daughter's card as growing old ;- 0 Well, no dissing here, though I'm bound to get a humorous card from her. I used the Penny Black stamp Pansy Bunny. I love the Penny Black stamps and actually, this is the only one I own. So far I'm still just drooling over them (child in college.) I colored it with copics and inked it with Fired Brick and Broken China distress ink, after cutting it with a  Hero Arts circle die. The papers are from DCWV Holiday Christmas Stack from last year. The embellishments are from K &Comapany's Flower and Bug asst. The sentiment is my own and the font is Chopin, which is one of the new free ones I just picked up (see the post below this one titled "So many fonts so little time.") I decided, since she is such a good friend to put the extra work in and make it an easel card ;- ) The stamped sentiment, on the easel part, is from Hero Arts's Birthday Wishes stamp set.


     The sentiment, on the inside top, was done digitally and it is again the Chopin font.


     I've included a side photo, because I need to be reminded how it's folded every time ;- ) Probably because I don't do them that often, though I do like them. The blog is titled "Beginner cards," so this might be your first exposure to them. If you have any questions on how to put one together, they are explained here or just ask me in the comments and I'll answer your questions. Can you guess when this needed to be in the mail? I can hear my frequent readers yelling, Today! They would be correct and it made it, because all I had to do today was photograph it after gluing in the inside sentiment!


     I have another card, almost finished that I should be posting tomorrow. Then, there are 2 more that I have to get done in the next couple of days. I know, CRAZY! I'll have to work on some thank-yous for those people who filled in for me and brought us meals, too. AND, it's almost time for the next progressive digital to be do. Isn't this suppose to be relaxing, ha ha! Would you believe, I joined another progressive at The Outlawz!? Probably, because I'm so quick at getting the first one done >.< The images for this one are just gorgeous! If your interested at all, here is your chance to get in at the ground floor and pick up 4 free digital images. Check them out here. You do need to be a member of The Outlawz to play, but joining is free.

Thanks for popping in ;- ) Please leave a comment, because I really appreciate hearing from you. It's wet and cold here, hope this finds nicer weather wherever you are ;- ) Keep on creating!

Sunday, November 6, 2011

So many fonts, so little time ;- )

     Well, things are getting closer to normal here. My DH's surgery went great and he's home. We'll know the next step after he sees the doctor on Thur. In the meantime he sent me an e-mail with this link, which is to a MacWorld article that has another link to some free fonts (which if you look each time you find more links to more fonts and more fonts and ....) His original intent was that the article was on the font Waltograph which is about as close as you can get to the Disney font that grew out of Walt Disney's own handwriting. The article, as I said, links you to this font and has info in the side bar that has another font or two. Following the chain, you can get a number of cool fonts, especially for font addicts like me, who use them inside my cards all of the time, or when I don't have the stamp that says quite what I want to say. These were all freebies and work on both Mac and PC. Some of the ones to look for are Doris Day, Requiemme Decorum (good gothic or for halloween - I know it's over, but it will come again),  ariapenciroman (open font with scribbles or maybe stitches loosely filling the letters in),  Chopin, Black Jack,  Sinister Visions ( set of halloween fonts), PR Viking, High Voltage (cool for teens) and Tattoo Lettering just to name a few. See what I mean. I found that I missed the Viking font while I was writing this. I'm addicted :-P I Had to change the font on the "P" on the face back there because I didn't like how the face looked. I wish blogger let me use more fonts,  ahahahaha ha! Sorry about that. I just downloaded 1 more, but I'll stop now (don't want to forget En Origami (capitals only) or Ironmaniac (maybe capitals only too, haven't tried it yet!) Here I just made this sample.


Click on it to make it larger, it's actually a jpeg.

     I also have 2 cards to show, but they are Make and Takes from Archiver's. Good thing they've been doing Make and Take's lately or I wouldn't have anything to show, hee hee. I do have a very good reason this time. Spent most of my time traveling to/ from the hospital, at the hospital or sleeping. I had one head clearing 1/2 hour at Archiver's after my DH was home and this is what I brought home.


     Do check out the link to the article and grab some freebies. If you need help installing the fonts, just let me know and I'll walk you through it. Thanks for peeking in today. Please leave a comment to help me keep my sanity, oops too late. Please leave one anyway, they really are appreciated ;- ) have a blessed week!

Sunday, October 30, 2011

Sweet Birthday.

     This card is made for my Aunt. I used one of the images from the Crafter's Digital Art Center's (CDAC) Progressive Challenge. We're in the 5th round and this image is by SSBS Design.  This post is going to be short, because I have to be up at 4am to get my husband to the hospital for his surgery and I just got back from driving my sone back to college. I colored the image in PhotoShop using a few patterns on the basket, the gingerbread men and her dress and headband. You really can only see the one on her headband after the image was sized to fit my card, though the gingerbread men look a bit more cookie-like ;- ) I mixed and swirled colors to make her hair. There is Diamond Glaze on her shoe to make it look like patent leather and glitter gel pen on the gingerbread men. I used Broken China Distress Ink. The papers are DCWV Holiday Collection Christmas Stack from last year. The gems are from Hero Arts as is the sentiment and the flower from Archiver. If I had more time, I probably would have cut out more gingerbread men and popped them up (I may still her birthday is in December, but the challenge is due today ;- ) There is no inside sentiment yet, so when that is done, we'll probably review this card, LOL.
Maybe I'll remember it.


     Thanks for stopping by and please leave a comment. Thank-you so much to those of you who do. they really are much appreciated ;- )

Thursday, October 27, 2011

     Phew, all 14 cards for my college students are done ;- ) My sofa is covered in glitter and snippets of paper, ha ha, but 5 made the mail and the others are stamped (1 awaiting a mailbox number.) I believe last year when I originally CASEed the one from Creating in Carolina I did them one at a time on the Expression. This year, I decided to move her SVG file onto separate layers so I could cut multiple of each item at 1 time. Here is the link to Cely's original post with her file. I made the card an A2 which makes the mouthes kind of small, so I thought I'd gotten rid of them all, but it still did the cut outs on the pumpkin. (Last year the pumpkin face was drawn in, no time for correcting mistakes this year. I'm down to the wire!)  I used Diamond Lace sickles on the moon, gel pens on the eyes, Crayola Pip Squeak glitter for the pumpkin mouth and Divine Swirls to emboss the background.


     The poem (which I showed on an earlier post) was one I found and modified. These are mostly students (trying not to call them kids ;- ) from my Church, who also had attended our K-8 Lutheran School, so I took the witch out of the poem. Yes, I know there is a ghost on the card, but he isn't doing sacrifices in the local forest preserves! You have to draw a line somewhere. Fonts are Lucinda Blackletter and LD Typset (the latter from Lettering Delights.)


     The card for my group that got this one last year, is the one that I teased you with. It is from... the Wild Card cartridge. It is cut at 3.75 inches on the Expression. I used my Gypsy, because the way Cricut designed it, the orange layer is the same as the black layer and you cut the square off and just use the pumpkin part of the cut. Too wasteful for me, so I used the Gypsy to overlay the cut, putting the next pumpkin on top of where the square would cut, continually overlapping the cards until the mat was full. This way I didn't waste so much paper. What was I going to do with a bunch of 3 3/4 inch squares of black paper anyway? I used spray glue on the "Boo" elements and then sprinkled Martha Stewart glitter on them. I colored in the eyes and mouth with yellow glitter gel pen.


     On the inside, I wrote with white gel pen. Font, debbie scribble, hee hee.

    
     There was also and envelope available with a liner. At first, not knowing the mailing code I thought I could use it. I made my son's in black however, because it's Family Weekend and I thought I'd just sneak his onto his desk. Later realizing my error (somewhere along the way, when my better judgement kicked in about mail codes) I decided that I would put the cute, small, decorative envelope into a normal A2 size envelope for mailing everyone's cards. On the white ones, I just went over the pumpkin with Marmalade Distress Ink.


     Here is the whole bunch, done, just before I noticed I only had 6 A2 envelopes left in the house and still had to call and get updated addresses for the students from last year and addresses for some of them for this year :- 0

Should have set them up better, would have if there was TIME! ;- )

     Thanks for stopping by and listening to my tale of woe. Hope you have a great weekend. Still so much to do before my husband's surgery and he's out of commission for at least 4 weeks. Please leave a comment, because they mean so much to me. It will be a great weekend, because I'll be seeing my son!