Saturday, January 29, 2011

It's the weekend?

     I can't believe it's the Saturday already. I don't know how these weeks fly by so fast. Here we are at the last week of January and mentally, I'm just ready for last Christmas (but that would be too long a story). Let me show you today's card.


     This card is for a friend of mine, who doesn't know I blog. It's A2 size (5 1/2 x 4 1/4), and I embossed the front with the Hero Arts cling stamp, Flower Wallpaper and kaleidoscope powder. I cut grey Core'dinations from the Super Assortment Pack sold by Hobby Lobby, at just under 2 inches. I added a pink strip of paper under it and another grey piece of the Core'diantions,  that I had punched with a Fiskers border punch and put underneath the other two. I used my plain oval and oval scallop nestibilities and a Hero Arts stamp for the sentiment. I then took a glitter pen and added some clear glitter to the scallops. The flowers are from Archiver's and the top one is embossed with more kaleidoscope embossing powder.
     Inside I just matted with the grey paper and made the writing digitally. I used Archiver flowers with a Paper Studio Spare Parts brad and a Cupcake sticker from K & Company to embellish it.
     What would I change? Well, seeing the front and inside together, I know I have a font from ScrapNfonts that would match the stamp on the front better called SNF Classy Charm. I probably would choose that for the inside. I also would straighten the cupcake a bit, though at the time I deliberately made it askew. I have used this style before, changing the colors for other occasions such as wedding and even sympathy cards. It's very versatile. I have in the past switched out the flowers for butterflies.
     My friend's birthday, who reads this blog, is Tuesday, so I can post that card here late Mon. I'm still trying to come up with the vases I'm suppose to use for the pasta dinner, so that I know what size to make the centerpieces. My husband has come up with some ides for them, so I'm looking forward to getting started on them.  Thanks for stopping by and giving me some of your time! Your comments are greatly appreciated as well.

Wednesday, January 26, 2011

Valentine from the past

     Well, I worked on my friends card today, so I can't post that. It didn't go as easily as I thought, but what does. That's a story for when a post the card, after her birthday though.  I keep seeing all these postings of Valentines. People have been showing them for weeks now. I haven't had time to think about what I'm doing for Valentine's Day yet, because there is so much to do in-between now and then. Do some of you find that too? I'm happy to get my cards done just in time to mail them ;- ) I really don't do many Valentine's though, fortunately. My DH, DS and one friend who sends one to me. I will mail to the college students in Feb. but Valentine's don't really seem appropriate to friends of my son, so I'll just go with a winter theme. So I decided to show you the Valentine card, I made for my friend last year. 


     I used my favorite, A Child's Year. Looks like it was cut at about 3 inches and has a shadow. I liked a vintage feel with the black and white in every thing except the actual Valentine images. I got the  background paper as single sheets at Hobby Lobby. I don't remember now where I got the heart image cut out. The ones on A Child's Year are much fancier. It might have been Plantin Schoolbook. I stamped and embossed the sentiment with metallic embossing powder. Here is a closer look, but it's a bit blurry. I'm afraid even though I used the close-up setting, I was still too close. 


     The papers inside also came from Hobby Lobby and the words and heart were printed from my computer. The heart stamp on the bottom is actually a Photo Shop brush that I got from a site that had freebies. I don't remember which one now, but if you're interested leave me a comment and I'll try to find it. They had a number of very nice free brushes for Valentine's Day available and they were all free! Thanks for spending your precious time here. Let me know what you think.

Monday, January 24, 2011

Birthday card surprise.

     I hope everyone had a great weekend. Unfortunately, not the Bears :- (  Oh well, this is Chicago, there is always next year. Today I worked on a card for a friend's birthday. I ended up someplace where I don't think I wanted to be with the card, so tomorrow, I'm going to go in a new direction with her card. Inspiration is funny that way. You start out with one idea and then see something and it takes you in a whole new direction and then you think you have it. I consulted with DH, who is often my design consultant and I love to bounce ideas off of him or my DS, when he is home from school. DH really didn't like the main paper I choose with the rest of the things, which caused me to step back and think about it some more. Some times you get too close to something to view it objectively, at least I do. Going over blogs today, I was on Lucy Abrams blog and saw a card she did and remembered my original idea, which had a cleaner look and fit the intended recipient better. Now you are probably asking yourself, self, why is she being so cryptic today? Well, that's because my friend reads this blog and knows her birthday is coming up. I don't want her to get any hints. I advised her not to be tempted and check, but temptation can be sooo, ah, tempting. So, today I'll share with you her card from last year. After her birthday, I'll share with you where this saga of creative stops and starts and of inspiration ended.


     The details are a bit fuzzy after a year, but the snowman is from Cricut's Stretch Your Imagination cart and I cut his hat out larger than the relative dial size. The snowman on this cart has a tiny hat and I wanted it to look more traditional. The snowflakes are also from Stretch Your Imagination,  just cut at different sizes. The snowman's body and snowflakes were heat embossed with holographic embossing powder and the snowman was pop-dotted. The front was dry embossed with the Snowflakes embossing folder. The sentiments on both the outside and inside were done with Print Shop, but you could use any word processor. The image on the inside was a Hero Arts stamp that I colored with watercolor pencils on watercolor paper.
     Tomorrow, I think her card for this year, should come together faster (fingers crossed). Maybe then I can start deciding on some ideas for those centerpieces and other decorations for the pasta dinner. Thanks for spending some of your very precious time here.

Saturday, January 22, 2011

One hundredth birthday.


     Here is the card for today. It is a request from a friend of mine, to send for a 100th birthday. I usually try to tie my cards to the person and Linda, when I asked for that consult, said "Yes, she has doilies decorating her house." So, I kept much of my original plan that I posted last time, but as often happens, when you go to put things together, you throw somethings out as you see them actually set on the page.  I used the Martha Stewart, Eyelet Lace, punch around the page. The card is 5 x 4 1/4. I liked K&Company Handmade paper because of the mirror embellishment on the paper (which doesn't show in the photo well), because of it's vintage feel. I inked the paper with Ranger Peeled Paint and added Perfect Pearls to give it some shimmer (also doesn't photo well, sorry) and punched the 2 corners with a corner rounder. I added a bow to the bouquet of flowers from some ribbon I got at Michael's to add depth and more flourish. I also embellished with 2 sizes of pearls.
     Inside I used the reverse side of the same paper. Originally I was going to use an image from A Child's Year, Cricut cartridge and glitter it, but for the silhouette to look right I had to cut it too large for such a small area of the card and it wouldn't leave much area left to write. I also planned on stamping the sentiment with a glue pad and glittering it, but since the recipient has vision problems, I thought that would be annoying, because often glittering a sentiment causes the sentiment to appear blurry to begin with. So I just stamped a Hero Arts sentiment with Memento ink. I cut the 100 from Cricut's Lyrical Letter's Cart (really getting a lot of use from that lately) at 1 inch, and inked with Peeled Paint and added Perfect Pearls.
     I'm really happy with how it turned out. What would I have done different? Well, I had some paper doilies ribbon that matched the Martha punch in theme that I meant to use on the inside, but with all of the changes on the inside, I forgot. I probably would have run it across the bottom under the 100, to anchor it. I also might try other variations of this card, but I think other than that, this card stands for why I needed it.
     The next project, I need to work on is table decorations for a dinner at Church. They will include smiley faces and hearts. I'm very good at making a mountain out of a molehill, so I better get started soon, plus for some reason these things always take sooooo much longer, than a reasonable person would think they should. There is some time warp thing involved here. The cards I still owe the Youth Director can be put off, because she gave me this new assignment, (I'm on the Youth Board), but I do have 2 personal birthdays, before I need the centerpieces. It's also about time to send a little love to 11 live-away, college students (kids my son went to grammar school with and kids of friends). I'm thinking hot chocolate packages in cards. It will be a busy Monday. Tomorrow, High Schoolers for lunch and chaperoning them through the Bears game.

Thursday, January 20, 2011

Thinking cap time.

     Well, I went up to my craft room and put on that thinking cap. It's harder to make a special card for someone you don't know for something as momentous as a 100th birthday, then I thought. Plus, I don't know if your head changes shape as you get older and the cap doesn't connect right or if the cap just gets old and doesn't work as well. I thought about when she was born and about what styles might interest her. Her is a collection of some of the supplies I put together.


     The patterned paper is reflective in the centers of the flowers and the other darker green spots, but it doesn't show up here. Ignore the odd green color on the paper near the bottom. It was some green flocking I thought about trying on the leaves, but it is too blue. The paper reminded me of vintage cards, so I thought she might like it.


     Then I got out a Martha Stewart Punch Around The Page punch and tried that for the first time on scrap paper. It reminds me of an old-fashioned hankie. I would probably make it in a very light green. I found an image on the Cricut cart "A Child's Year" (my favorite), that was a silhouette of of similar roses that I could use on the inside of the card. Here is a photo of all the assembled supplies, except for the Cricut booklet.


     Now, I started to second guess myself. If she was born in 1911, she could love the Art Deco style and not that flowery style. Time to send photos to my friend Linda and ask for a consult, since the card is for her to give. Hope to get started on it tomorrow, but I do have errands to run too.
     We're expecting very cold weather here. At least it's just overnight and tomorrow. Should be better for the Bears's game, though I wouldn't want to be out in it. DH and I will be entertaining High School teens for the afternoon, in what we call Youth Lounge at Church, which will include the football game on TV for those interested.

Wednesday, January 19, 2011

Birthday card for a Friend

     Today's card is a more typical card for me. It's for my friend Gywn. Typically when I make a card for a friend I try to tie it to that person. I don't make many general cards. In this case the image will be a penguin, because Gwyn has often considered that her symbol. She uses the word penguin to tell people how to pronounce her name, so that they don't mispronounce it Gwen. So it's convenient that she has a January birthday. Let me show you the card and then I'll tell you how I made it.


     I used the penguin from the Cricut Create A Critter cartridge. I cut the penguin with the layers at
2 1/4 inches on my Cricut Expression. I used the Gypsy to lay the whole card out first to make sure the words would fit in the space of an A2 card. After I had all of the penguin layers set out, I choose the phrase, "chillin'" from the same cartridge. I sized it at 2.5 inches wide and it was cut out of the DCWV Holiday Collection Christmas Stack. I realized it would be too similar to the background paper and since it was already the shadow cut, I made a second cut out of black and sized it 1.45 inches high. The original cut was 1.35 inches high, so I went up one tenth of an inch to make  the background cut. Due to the fact that the cuts are curved, it's not really a shadow, but I placed it so that it shadows as if the light were below it. I used the Cricut cart Lyrical Letters to type out "on your Birthday" at 1 inch high on the Gypsy and then welded the letters of each word except for the B. I tried the letters smaller, but the smaller letters didn't cut well, esp. welded. The orange cardstock is from Cord'inations. the rest was scraps, so I'm not sure. I used a pearl gem to dot the "i".  I used the Cuttlebug Divine Swirls folder to emboss the background layer with my Big Shot. I embellished the "chillin'" with Diamond Stickles, even adding icicles. here is a close-up.


     I had meant to try the icicles before the card was put together, in case they didn't work out, but as usual, I forgot my smart idea and had the whole thing put together first. Still, I tried my icicle idea and was happy with the way they turned out. On the inside, I matted 2 pieces of patterned paper from DCWV Holiday Collection Christmas Stack  (one at 5 1/4 x 4 and the other 5 X 3 3/4) and added the birthday wishes which I had done on my computer using Print Shop. The fonts I used were Snowcaps by Simply the Best Fonts and SNF Jester Play by ScrapNfonts. Snowcaps is a free font and SNF Jester Play is currently $5, but they often have sales and I think I got it for $1 or $2. I then added  a cute penguin dimensional sticker from Recollections and an epoxy bubble icon from Craft Essentials. What would I have done different? I had meant to tear some white paper to look like a snowy base for the penguin on the front to stand on to ground him, but forgot. I probably would have used Stickles on that as well. Otherwise, I'm pretty happy with the way this card turned out.
     I've been asked by a friend to do a card for a 100th birthday. Time to put my thinking cap on. If anyone has any ideas, please chime in. Thanks for looking in.

Saturday, January 15, 2011

Quick Card using Smiley Cards


      Finally, a card that went together quickly. This one gave me no problems and I was able to make 2 at a time, with a few design changes.  The only difficulty with Smily Cards, which is a free download to the Gypsy if you register it before Feb. 28th, (there are 4 other free downloads and it comes with 2 pre-installed carts) is there is no handbook since it is a download. You can find a cheat sheet online, but I'm afraid I can't remember where I found it. If anyone knows let me know. As I was looking for it, I found that Joy at Obsessed With Scrapbooking has a handbook on her blog Here. That would have been helpful earlier today, because the cheat sheet showed them put together, and on the Gypsy, it was hard to tell what the layers were meant to be, at least for me. So I'll go over it in case anyone else in interested. Skip down if not. The first layer of the Emoticons is the black background the makes up the eyes and mouth and goes behind the yellow circle. The shift of the key is the top layer and I cut it using Yellow from DCWV Premium Cardstock Pack in Brights. Both were cut at 2 1/2 inches. Next is the Emoticons Layers. The unshifted one gives you the cheeks, (mine were cut from peach scraps), and the shifted one is the highlight at the top of the smiley (white cardstock from Walmart). Finally, the next element of this image is the Phrase. The Thx is unshifted and I cut it from grey scraps on 1 3/4 inches. The shifted Phrase is the speech ballon and it was white cardstock cut at 2 inches. For some reason they didn't look like the Thx fit inside the balloon on the Gypsy screen when both were at 2 inches, so I cut it smaller.
     The first mat is yellow from DCWV Premium Cardstock Pack in Brights, cut at 5 1/4 x 4. The aqua piece was cut from Core'dinations paper at 5 x 3 3/4 and I ran it through my Big Shot, using Sizzix Texture plate Petite Daisies, from the Texturez Starter Kit. I didn't think the embossing was very deep so I sandpapered it lightly to bring it out more. On the inside I used the same yellow paper and made a black circle using the base emoticon at 1 inch and then the same one in yellow at 1.95 to go over (so that you could see it on the yellow background) and drew the face on it.  Actually, as I was cutting all of the pieces out, I cut out 2 of everything, because I knew I wanted to make 2 cards. I was able to use the power of the Gypsy to set up the cuts so that I could cut it all out at one time, since I could see where everything would cut-out and position the paper colors in the correct spots. I stamped and embossed the inside with a sentiment from Clear Dollar Stamps sentiments called, Church Chatter using Memento black ink.
     The second card appears below. The only differences are that I ran the aqua background through the Big Shot using the Square Patio Texture plate from Sizzix Texturez Plate Kit 2. This time I put a shim (a couple of pieces of scrap cardstock in the embossing "sandwich" to try and get a deeper emboss. It worked except for the fact that the pieces were smaller then 5 x 3 3x4 so the deeper embossing is only in the center, but I didn't mind the distressed look. I sanded this one as well. I also used aqua cardstock on the inside of this one, so I skipped the black shadow on the inside smiley face.
     These can easily be used by our Youth Director for teen volunteers or just to catch a teen doing something nice. I think either can be used for male or female, but the second is more masculine if you had to choose. At our Church or 3rd though 5th graders are making cards for military personnel, stationed in Iraq and Afghanistan to send back home to their loved ones. Everyone loves to get a card!


Thursday, January 13, 2011

Another Card, Link to Free Fonts and Photos


     Here is the card I made today for my Youth Director's use. This one was made to be more general. She could still use it as a Thank-you card or she could use it for a teen for encouragement or even graduation or anytime for encouragement of a volunteer. I used the Imagine for this card with the 
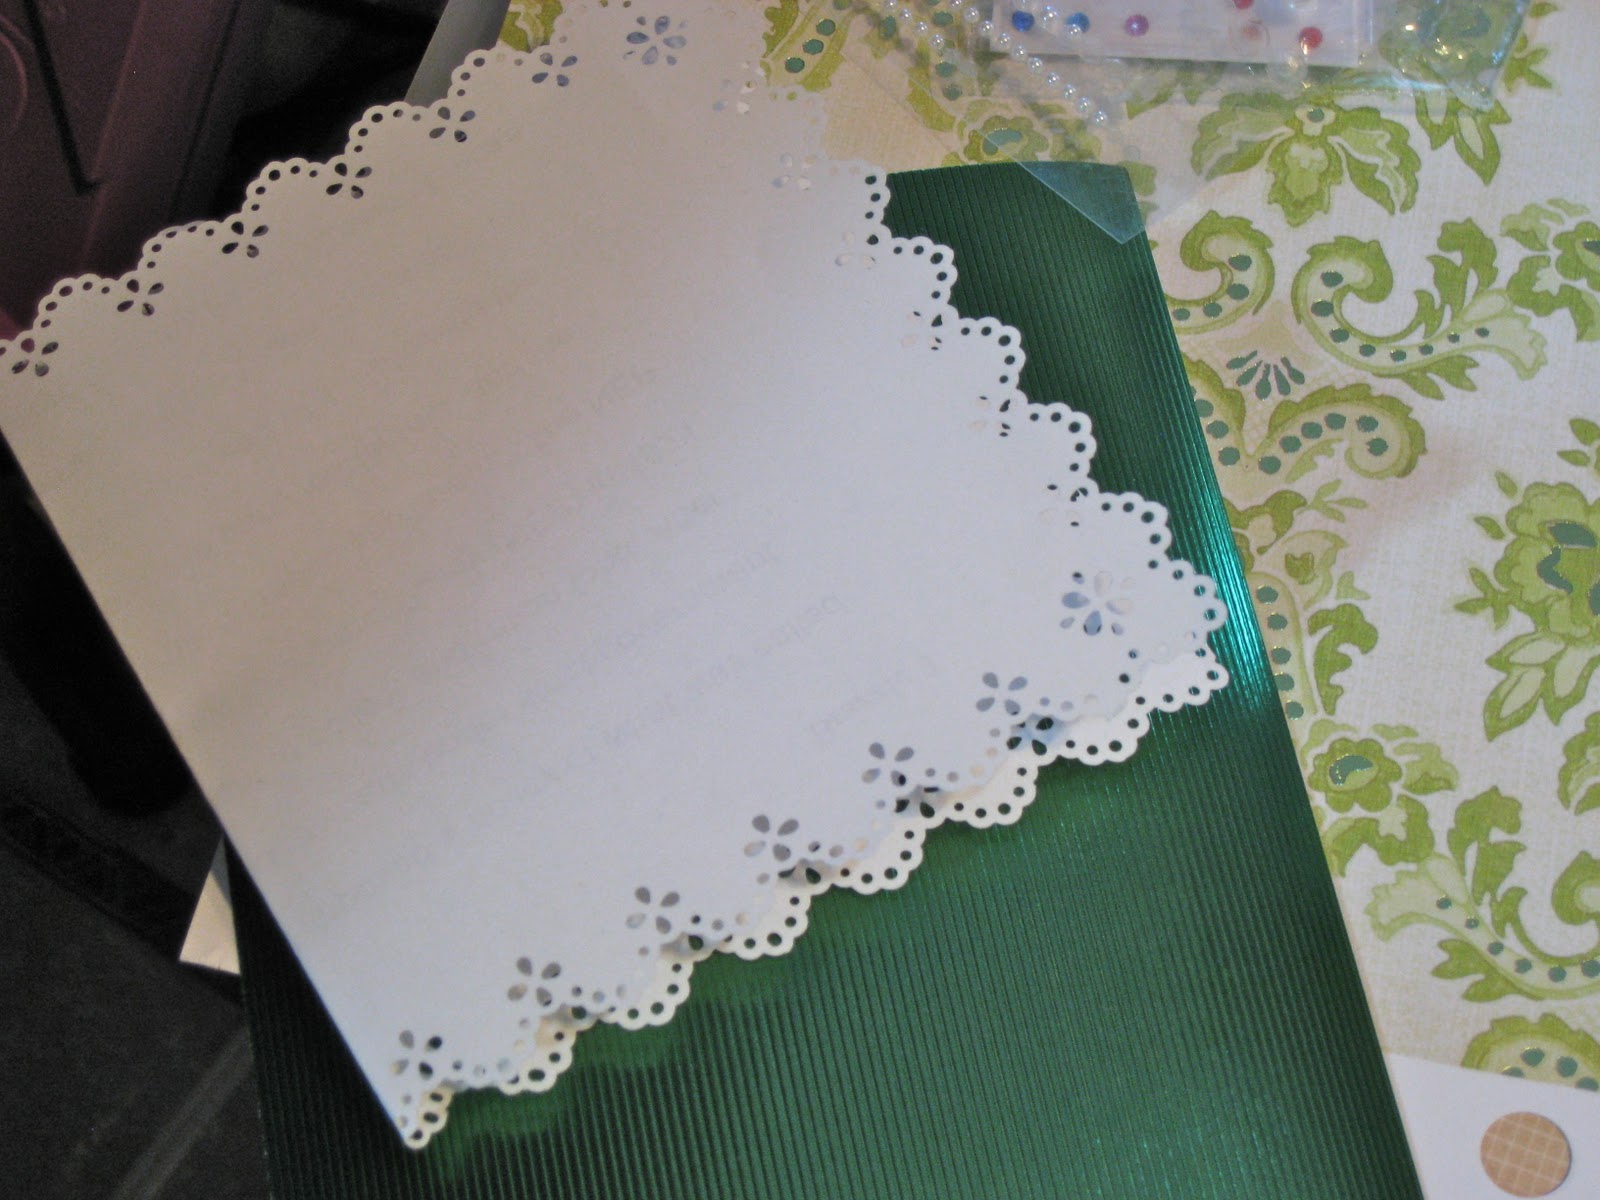
Imagine More cart. Keeping it quick and easy, I cut it with without layers at 2 1/2 inches, also cutting 3 butterflies from the layer option on relative size at the same time. The background papers on the outside and inside were both made with the same cart using the background patterns and the built-in shapes on the Imagine. I used the square, because unfortunately the Imagine doesn't have a rectangle  with an A2 aspect ratio ;- ( This makes absolutely no sense to me. It seems like one of the most logical shapes to include for matting. So I use the square and over-cut picking in this case, 5 1/2 inches since that is the longer side that I needed. I cut it to fit the A2 card which would be 5 1/2 by 4 1/2. I curled the wing of one of the butterflies and attached it to the front to give dimension. I added a bit of bling by going over the butterfly with Gelly Roll  Clear Star marker. This so one of may favorite ways to add sparkle without the mess of glitter or trying to match glitter marker colors. It's a clear glitter maker that just adds a bit a sparkle. It's not easy to see it the photo though. I just did the dots and traced around the details on the butterfly. I also used a White Signo pen to go over the stitching on the oval to make it stand out. I almost hate to say that I used Viva Decor Pearl Pearl Pen to add the dots below the butterfly, because I didn't do a very neat job and this is a very good product, which makes great pearl dots. I need to practice more and not rush, like I did here. I had a strip of coordinating paper from another pattern from the Imagine More cart, left from another project, that I added to the top of the inside. I stamped this with a sentiment from Clear Dollar Stamps, Church Chatter sentiments. Next I added the other two butterflies to finish it off. What I would have changed? I probably would have made the image on the front larger, maybe 3 inches to better fill the front of the card. 4 cards down. Next I should work on some masculine ones because we do have male volunteers.

     I also picked up some free fonts from scrapnfonts.com today. They had 15 new free fonts available, if you had signed up for a free account. If you sign up no, you also get 3 free fonts for signing up. That's a total of 18 free fonts for newcomers. They have lots of great fonts that work for both Windows and Mac. Many of the fonts would be great with the Cricut if you have SCAL Sure Cuts A Lot, which is a third party program that lets you cut any font on your Cricut (it will cut it, but all fonts aren't practical based on the thickness of cuts and details of the cuts).  Even if you don't have SCAL, these fonts are great for use in cards and on scrapbook pages. Scrapnfonts puts out a newsletter with ideas, add new fonts often and regularly has great sales, so check them out. I use their fonts inside my cards and on flyers that I make for the Youth Bulletin board all of the time.

     Today, I'm going to leave with a few photos. I was out the other day getting the mail and I took my camera. Sharyn Sowell, check out her blog here, has helped me see more things in the little details. Though when I checked out her blog today she was noticing the big picture ;- ) So I try to catch details as well as patterns and textures in my photos, not just the usual photos I use to get. So, let me share some with you and maybe you will find some inspiration in them too.

 This is the snow on my back deck. I know jealous aren't you. Here in the midwest and my deck isn't covered enough to keep the boards from making a pattern. Can't say I'm complaining. I just liked the pattern it made.

 This is the birch by my house. Love the texture both in the summer and winter. Below is a close-up.

And lastly, I love the texture and depth of this photo. Also the greys in the background. Don't miss the beauty all around you as you rush through your day.

Tuesday, January 11, 2011

First card of the New Year


     Ok, here is the card from yesterday. I had decided I wanted to do a shaped card and liked this postage stamp one from Cricut's Birthday Bash cart. It was one that I had chosen on my Gypsy when we took my son back to school. I had decided to make it 5x5. First problem, no 5x5 envelope. There was no square envelope on the cart, so I figured I'd use my Ultimate Crafter's Companion. Find info Here. DH insisted I get one at CHA in Chicago after he saw it demonstrated. Isn't he supportive ;- ) Second problem, there are directions for a 6x6 and a 4x4 envelope. Did I mention these were suppose to be quick cards? There is I line between those to make the 6x6 and the 4x4 envelopes so I decide to see if it will make the right size envelope. Through a bit of trial and error, I find that if you use a square of cardstock 8 1/16ths you will get an envelope 5 1/8. Perfect for a 5in square card. Easy peasy!
     As I mentioned yesterday, these cards I'm making are for our Church Youth Director to give to volunteers and teens as she needs them. I decided to go with the snail image that Birthday Bash uses with the stamp card base (snail mail) and to make it a thank-you card. I cut the snail and all it's layers at 2 inches. I then decided that although his face cut out well, I'd draw it on, rather than glue my fingers, or run it through the Zyron. The snail was made with misc. scraps from my scrap box and the background paper was from the Imagine More cart from the Cricut Imagine that I left over from another project. My snail is a snail and does leave a trail, ewww, with Viva Decor glitter liner. The "Thanks" is from Gypsy Wanderings on the Gypsy (also pre-compiled on the college trip) cut at 2 3/4 inches. The flower gems are from Kaiser scrapbook. The sentiment on the inside is from Church Chatter by Clear Dollar Stamps. I love these stamps for this type of cards and use them often.
     Now, there are some things I would have done differently about this easy card. I wouldn't have colored in the antenna on the snail (Statlightz Glitter Gel Pen). I just dont like the look, but sometimes what's done is done, move on. I also should have inked everything, esp. the card base. I thought of this after everything was put together, but I've learned from experience that if I do it at the end, I probably won't like it or will mess it up and then I've ruined the whole card. So I left it. I also question the color of those gems,  but I like them, so not sure. The snail should be placed farther to the right.


     So, today I was going to make it easier (wasn't that what I said about yesterdays' card)? I picked the Bird on the Branch image from the Imagine More cart on the Cricut Imagine. I cut in layers to glue it on an A2 blank. However, (were you ready for a however), the rectangle isn't A2. I trimmed off  the right and left sides to make it mat on the A2 blank (we're just going brut force today - EASY). Then layered the rest of the pieces and pop-dot the bird. The "Thanks" came from Cricut's Lyrical Letters cart filled with a pattern from Imagine More on the Imagine. On the inside, I printed just the bottom layer of the same image as the front and cut it down and also printed the bird on real dial size of 1 inch (bird only). The sentiment is also from Church Chatter by Clear Dollar Stamps. I placed the bird on an oval cut by the Imagine from it's installed shapes because otherwise the bird blended in.
     I also started another card, which I will finish and show next time. These aren't great cards, but my goal with these are to be relatively fast. See I've added a modifier now. But I do want them to have some level of detail or texture.  Let me know what you think. Thanks for reading my babbling.

Monday, January 10, 2011

Not a Good Start

     Well this doesn't look good. I start my blog and then it takes forever before I make a second post. First we took my DS back to college. That day I expected not to post and on the car ride I was a good do-bee and worked on some ideas on my Gypsy, so not really a bad start. Then after that I started into a series of cluster headaches, which are a magnitude worse then migraines. I know because I suffer from both. None of my usual remedies would knock down the cluster and the one series went on for nearly 24 hours without let up. That left me very weak and unable to do anything. Now on the other side, I'm feeling back to normal. Today I got back in the craft room for awhile and made a trip to Michael's.
     I'll try to post the photo of the card I made tomorrow. I haven't taken the picture yet.  I'm making up a set of cards for the Church Youth Director (I'm on the Youth Board for Publicity/Communications) for a belated gift. They are for her to send as thank-yous and such to volunteers and teens as she needs them. I'm trying to be simple and quick, but things are usually not simple and quick with me ;- ) I seem to find a way to make them time consuming and hard.
     During my down-time, I caught up on some inspiration. Custom Crops have added some more carts to their sale and the prices are super low. Also, Narelle Darley, Girl From Oz created a .pdf of all the Cricut fonts with examples, including those hidden ones on shape carts, on her blog and you can download it free. Check it out and give her some love for all that time she put in.  Check out her blog Cricut Lovers Guide to Design Studio. I'll try to get my Fav Blogs listed on the side soon, too. I have soooo many, I can never get through them any more. One leads to another and another and another...  There are so many creative people out there.  So much to do, so little time and I do like to get my sleep.

Monday, January 3, 2011

First post, a new adventure.

Well, this should be interesting, at least for me. I am amazed at how prolific so many people who have blogs can be. While I don't expect to be able to spend that much time on this hobby, it's something to work up towards. I hope to include here all different aspects of my life, as well as my cards, hopefully without being too boring. This may spark some creativity in some people or may just be a monologue to myself. Anyway, I've decided to give blogging a go. Something new for the New Year. I do have some card goals lined up. I need to make a set of simple mixed cards for our Youth Director at Church for her to send to volunteers and others as the need arises to encourage them. This is actually, sort of, a belated Christmas present. Which means I should probably start Valentines pretty soon too! I'm usually finishing things up just as I need to send them out, hopefully not a day late ;- ) Well, enough for now. We still have friends to celebrate Christmas with before my son goes back to college. First post under my belt. HA!