Sunday, October 30, 2011

Sweet Birthday.

     This card is made for my Aunt. I used one of the images from the Crafter's Digital Art Center's (CDAC) Progressive Challenge. We're in the 5th round and this image is by SSBS Design.  This post is going to be short, because I have to be up at 4am to get my husband to the hospital for his surgery and I just got back from driving my sone back to college. I colored the image in PhotoShop using a few patterns on the basket, the gingerbread men and her dress and headband. You really can only see the one on her headband after the image was sized to fit my card, though the gingerbread men look a bit more cookie-like ;- ) I mixed and swirled colors to make her hair. There is Diamond Glaze on her shoe to make it look like patent leather and glitter gel pen on the gingerbread men. I used Broken China Distress Ink. The papers are DCWV Holiday Collection Christmas Stack from last year. The gems are from Hero Arts as is the sentiment and the flower from Archiver. If I had more time, I probably would have cut out more gingerbread men and popped them up (I may still her birthday is in December, but the challenge is due today ;- ) There is no inside sentiment yet, so when that is done, we'll probably review this card, LOL.
Maybe I'll remember it.


     Thanks for stopping by and please leave a comment. Thank-you so much to those of you who do. they really are much appreciated ;- )

Thursday, October 27, 2011

     Phew, all 14 cards for my college students are done ;- ) My sofa is covered in glitter and snippets of paper, ha ha, but 5 made the mail and the others are stamped (1 awaiting a mailbox number.) I believe last year when I originally CASEed the one from Creating in Carolina I did them one at a time on the Expression. This year, I decided to move her SVG file onto separate layers so I could cut multiple of each item at 1 time. Here is the link to Cely's original post with her file. I made the card an A2 which makes the mouthes kind of small, so I thought I'd gotten rid of them all, but it still did the cut outs on the pumpkin. (Last year the pumpkin face was drawn in, no time for correcting mistakes this year. I'm down to the wire!)  I used Diamond Lace sickles on the moon, gel pens on the eyes, Crayola Pip Squeak glitter for the pumpkin mouth and Divine Swirls to emboss the background.


     The poem (which I showed on an earlier post) was one I found and modified. These are mostly students (trying not to call them kids ;- ) from my Church, who also had attended our K-8 Lutheran School, so I took the witch out of the poem. Yes, I know there is a ghost on the card, but he isn't doing sacrifices in the local forest preserves! You have to draw a line somewhere. Fonts are Lucinda Blackletter and LD Typset (the latter from Lettering Delights.)


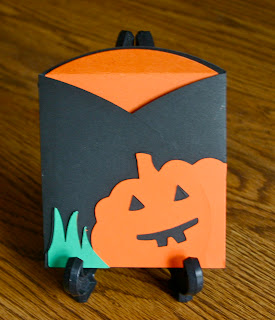
     The card for my group that got this one last year, is the one that I teased you with. It is from... the Wild Card cartridge. It is cut at 3.75 inches on the Expression. I used my Gypsy, because the way Cricut designed it, the orange layer is the same as the black layer and you cut the square off and just use the pumpkin part of the cut. Too wasteful for me, so I used the Gypsy to overlay the cut, putting the next pumpkin on top of where the square would cut, continually overlapping the cards until the mat was full. This way I didn't waste so much paper. What was I going to do with a bunch of 3 3/4 inch squares of black paper anyway? I used spray glue on the "Boo" elements and then sprinkled Martha Stewart glitter on them. I colored in the eyes and mouth with yellow glitter gel pen.


     On the inside, I wrote with white gel pen. Font, debbie scribble, hee hee.

    
     There was also and envelope available with a liner. At first, not knowing the mailing code I thought I could use it. I made my son's in black however, because it's Family Weekend and I thought I'd just sneak his onto his desk. Later realizing my error (somewhere along the way, when my better judgement kicked in about mail codes) I decided that I would put the cute, small, decorative envelope into a normal A2 size envelope for mailing everyone's cards. On the white ones, I just went over the pumpkin with Marmalade Distress Ink.


     Here is the whole bunch, done, just before I noticed I only had 6 A2 envelopes left in the house and still had to call and get updated addresses for the students from last year and addresses for some of them for this year :- 0

Should have set them up better, would have if there was TIME! ;- )

     Thanks for stopping by and listening to my tale of woe. Hope you have a great weekend. Still so much to do before my husband's surgery and he's out of commission for at least 4 weeks. Please leave a comment, because they mean so much to me. It will be a great weekend, because I'll be seeing my son!

Tuesday, October 25, 2011

Finishing in the past and beginning the new.

     Well, I have a couple of things to cover today. Who'd of thought ;- ) First, you'll recognize this card. It was made for my sister-in-law and the progressive challenge at Crafter's Digital Art Center. You'll find the info on it here.


     However, at the time I hadn't finished the inside.  I thought you'd like it. I found an image by googling woman screaming and vintage.  If you can't find it and are interested, drop me a line and I'll send it to you. I only used a part of it and I used a black gel pen to make a frame. The font is a freebie called Greenfuz and the line element is from Print Shop.

Kind of a fun surprise ;- )

     The next card is for some friends, who have been trying, unsuccessfully for a number of years, to have a baby. Recently, they were out of town at a family wedding when they got a call that they needed to get to the hospital immediately, there was a baby waiting for them. The attended the wedding and drove through the night and are happily, now a family ;- ) This is the card I made for them. I used my Cricut Imagine and the Nursery Tales cart to make the background paper and the layered images. However, I used my Gypsy to make the shaped card from a shape from the Storybook cart with my Expression. I then cut the same shape using the paper I had made with the Imagine, on the Expression 1/4 smaller, to use as the background paper.  (Got all that ? Good! or are you yelling Equipment Overload!) I used glitter pen on the dragonfly wings and gel pens on the frog and grasses. What are the chances of sticking you hand in wet gel pen? In my case 100% I added Martha Stewart Brown Flockingto the cattail and wiggle eyes to the frog, as well. The sentiment is my own. The font is SNF Classy Charm from Scrap N Fonts cut with oval nestabilities.


You can sort of see the details. Will be getting my camera back soon, thankfully.

     In order to do the sentiment, I printed a coordinating 3 in. by 3 in. square of pattern paper. I attached that to a piece of printer paper. Before running it through, I did a test run, to make sure I knew where my sentiment would print and which way to put the paper in. Now, I accept no liability for your printer, if you try this ;- ) I try not to let my husband know that I'm doing this >.< I set it up so it would print in the upper corner and taped the paper in the upper corner so the tape was on the back (securely.)


      I cut a second shape for the inside and using the same SNF Classy Charm font, on plain printer paper,  I added the inside sentiment. I also used DB Frilly Words from Lettering Delights to add the words near the center and the element in the center is from Print Shop. I embellished it with more layer images from the Imagine Nursery Tales cart. On this card, I've obscured the name to protect the innocent ;- )

    
     I also always sign the back of my cards with a matching ink and on some I also add an embellishment.


     I thought I'd give you a sneak peak at the beginning of the cards I'm making for the college students. Do you know what Cricut cartridge I'm using? I'm working on the Gypsy to move the multiple images around to save paper.


     Thanks for stopping by and spending some time with me. It means so much to me ;- ) Hope your week is filled with creative time, new inspirations, and blessings. Please take a moment to leave a comment. Thanks!

Friday, October 21, 2011

Check out the Promarker giveaway.

     Enfys and Letraset are having a promarker give-away. Check it out on her blog here. It runs until Oct. 31st. Good luck and have a great weekend ;- )

Thursday, October 20, 2011

Holding on.

     I have 2 small things to show today, but I got so much less done than I'd hoped. In my studio today, I worked on making a holder for the note cards I made for my friend, Susan. Yes, I know I made those a long time ago, but we haven't connected since and tomorrow we are finally going to lunch together, so, just in time, I'm finally making the note card holder and envelopes. I used Cricut's Tags, Bags, Boxes and More to cut the shopping bag holder. I used the Gypsy set to weld, so that it wouldn't cut tick marks that show you where to score the bag. I figured I could handle that and not have the rough edges those cut marks leave. When I originally made the notecards, I made an extra set of the image and mats as well as an extra border to use on the holder, so that was all done. Below is also a photo of the set of note cards. Here is a direct link to the post if you missed it. The image is by Glitterbabe and was for CDAC's Progressive Challenge.


     See, nice and quick, but at this point the migraine beast won out and I surrendered. Earlier in the day however, I had gone to Archiver and did their Make and Take, which this week was featuring Tim Holtz products.  Yes, I'm still missing my camera. Sorry about the photo quality. It used stamps, embossing (lined up over the stamp), diecuts, distress inks, and distress stickles (which were still wet when I stuck my finger in the ooey, gooey eye socket of the skull - just trying to add some halloween ambience ;- )


     You'd of thought I'd have gotten a lot more accomplished this week, considering my husband's been out-of -town and I haven't been out lunching (until tomorrow - that is.) Thanks for stopping by today. Please leave a comment and I'll feel this is a more productive day, ha ha.  Have a inspired day!

Wednesday, October 19, 2011

This post is really haunted.

     Well, I had expected to have a new card for today, but interruptions won out. It's OK though, because all of the interruptions had to do with people and they are always more important anyway. So since I didn't have a new card and I know what card I'm doing for the freshman college students that I'm sending too, I thought I'd show you the card I sent to the freshman last year, which should be the same. Basically, it a CASEed card, OK, it's totally copied from Cely at Creating in Carolina. She created the svg, that I used to make the card. How easy was that for me ;- ) Some of the ones I made last year deviated, because I forgot to emboss them, but that was a mistake. The embossing made them soooo much better. Here is the link to her (the master creator's) original post. I was happy when I checked the comments to see that I did leave her a thank-you (phew) because she knows who I am know that I have a blog, hee hee. So here is the card, though I can't give you the details. I'm lucky I can give you the details, the day after I make a card.


     I can tell you that on the inside, the fonts are Lucinda Blackletter and LD Typeset (the latter is from Lettering Delights.) I always save the digital files I create, so I can look that up easily.


     Thanks for stopping by. Hopefully I'll have more to share tomorrow. Please go and leave Cely a comment on her blog ;- ) Have a wonderful and creative and inspired week!

Saturday, October 15, 2011

Anniversary Swirl

     Well, I'm still behind but I do have 1 card done ;- ) It's an anniversary card for a dear friend's (who I've known since 2nd grade and is my son's godmother) son and daughter-in-law.  I used the oval card in Cricut's Wild Card cart  (6 1/4 in. if you cut the envelope to fit a 12 in pice of paper) for this card and welded my own Happy Anniversary from the Plantin SchoolBook cart on the Gypsy using the Wisteria paper from Basic Grey adding a gem from Hero Arts for the dot in the  i and a flower from Creative Charms. In the nothing comes easy category of my life lately,  my Xyron was jammed, but fortunately the LetraTac came through for attaching the sentiment (see posts here, if you want to know more about LetraTac.)  To cover the window, I cut the blackout option and cut it in half, using only 1 oval here.


     On the inside, I made a digital sentiment using LDJ Jilligraphy font from Lettering Delights. You can find them at the affiliate link on my side bar. I also added a line element from Print Shop, which is what I laid it out in. I cut the sentiment with an oval nestibility and inked it with Distress Inks Peeled Paint and Concord Grape. The swirls are from the same Oval card in Wild Card, under the icon button and I used the Gypsy to reverse one of them. I added pearls to the ends.


     I made the matching envelope as well. I used the remaining oval, cut in half, in place of the envelope liner (I had a mail carrier to beat and waste not, want not ;- ) I might have blinged it up some if I wasn't in a hurry, but I do like the simplicity of the way it turned out, so maybe all in all it was a good thing. The green paper is Bazzil from Archivers.


     I will probably make, the now belated anniversary card that is left, the same, possibly in different colors. It will depend on what I find when I dig through the mess I made in my studio. I also will have to make a belated birthday card. She is such a good friend, she will understand and will probably get a call and maybe that will just be all she wants. She isn't a card sender, herself. Then I'm on to my next crazy bunch. I'm sure that I'm already running behind. >.< I know I need to make 2 groups to go out to the college students I send to.  I wanted to get them out before Halloween and I haven't updated my total to include the new freshman, so I don't even know how many I need to make. Though, I do know what I'm making. For the ones I sent to last year I have a design picked out and the new ones will get the same design I sent last year, ha ha!

  Thanks, as always, for stopping by. I'm glad you came.  Please feed my ego with a comment or ask any questions you might have ;- ) Have a blessed and creative day!
     

Thursday, October 13, 2011

Scaredy Cat plus some links to freebies.

     Today's card features an image from the 4th round of the Digi Freebie Progressive Challenge over at Crafter's Digital Art Center. The image is from Design2Delight Digital Stamp by Faith Skrdla. I colored it in PhotoShop. I decided it would be difficult to color the cat black (plus his features would disappear), so I got creative and checked out some free PhotoShop patterns and found some that simulated fur by Obsidian Dawn (find them here). I decided to use Cheetah ;- ) This card is for my husband's sister-in-law's birthday. She really loves halloween and her birthday is near it, so I usually do a halloween themed card. The font on the right is Firecat Medium by David Rakowski. You can get it here as well as a number of other places. The Snoopy is a free dingbat called Snoopy Ding by JBS you can find it here. The final font, at the bottom, is LD Penelope is from Lettering Delights. Just click the affiliate link on my sidebar.
     The sentiment on the right was inked with Black Soot Distress ink. I used a glitter pen on the eyes and mouth of the Snoopy pumpkin (sorry it didn't show up well in the photo >.<) and just had to color Snoopy's ear, eye and nose with a black gel pen. It just offended my Snoopy sensibility to see them orange, hee hee. The bottom sentiment was cut with the small scalloped nestibility. I also added a large black flower from Archiver with 2 buttons in the center tied with twine. Sorry, the photo quality isn't up to par, but my son has my camera. I miss it :-(

Click on photo to enlarge

     There's still time to join the next round of the Progressive Challenge for $1 to get the images. there will be 1 more round after that. Thanks for stopping by and taking a peek. Please leave a comment, because they mean a lot to me. Have a inspired day!

Wednesday, October 12, 2011

Mini Luminary.

     Today's post is going to be short. I said I'd try to post the make and take from Archiver, so that's what I want to post. Plus, I also have a link to another blog, where I saw a great up-cycle idea today. Most of my day didn't go as planned. Today was the day for my husband's colonoscopy and it led to another doctor and a trip to the hospital for further tests, in preparation for an unexpected surgery, scheduled for later this month. So, as I mentioned in an earlier post, get those screening colonoscopies!

Here is the make and take from Archiver. It used the Martha Stewart Punch All Over the Page and MS Scoreboard. I thought the paper was neat, but didn't get the info on whose it was, sorry. If I was paying better attention and not just following instructions like the sheep I am, I would of had the front go to the back instead of the other way around so the back edge didn't show in the front. You can click on the photos to make them larger.


     My find today, came from Diane at Capadia Design. Here is what she made.


And this is what she made them from. 


     OK, from the lids plus vellum and some embellishments, but I thought it was very creative.  Get all of the details from her post here.

     Thanks for stopping by. Please leave a comment so that I know you were here. I really appreciate them. Have a Blessed day!

Tuesday, October 11, 2011

Hydrangeas in the fall and other inspiration.

     Well, I didn't get a card done today. I did get over to Archiver and did their Make n Take, but I didn't get a photo of it yet. I'll try to post it tomorrow. Saturday, I took photos of my hydrangeas, before I gave my camera to my son, for his class at the Disney Institute. (I'm really going to miss my camera :- (  ) I thought I'd better get those photos I wanted, since I won't get the camera back until the end of the month. The hydrangeas are the Endless Summer variety and bloom blue in the summer, but turn this neat burgundy shade as the season goes on. I didn't get a photo of it, but if you lift up the bloom, they are greenish. Very interesting.


Since, I was out, I decided to get some other photos as well. I figured, some of them could be used to make digital card elements or digital paper.


I don't know what's gotten into this rose bush, but I had to bend this rose down. It's over 6 feet tall. 


My puppy is now 6 months old. He loves to chase the bugs.


The end of my strawberry crop. Today the chipmunks were really after it.

     Well, we're expecting a few more beautiful days before the temperatures get seasonable ;- ) Hopefully there still is and Indian Summer to come. Love to craft, but hate to be inside when we have these exceptionally wonderful days! Have a great week.


Friday, October 7, 2011

A Painted Garden Using Embossed Resist.

     Today's card is for my dear friend and neighbor.  I had purchased the stamp Flower Bird Garden by Hero Arts a number of months ago and hadn't even opened it yet. I thought it would be perfect for Linda, because she always has beautiful flowers around her house and I often visit while she gardens and I sometimes help pull weeds. We also water each others plants when the other travels ;- ) I was feeling a bit artistic, so I stamped it with Tumbled Glass Distress Ink and clear embossed it. Then I hand painted in the flowers and hummingbirds with Distress Inks. Yes, I did get out my Field Guide to do the painting on the hummingbirds ;- ) I colored in the light color washes first then added the darker details with a fine brush after it dried a bit. I created an embossed border with Cuttlebug's Frills Embossing Borders, then hand cut a pennant shape for the sentiment. The sentiment is from Clear Stamps (stamped with Marvey Brush markers)  and the shape was inked with Tumbled Glass.


     On the inside, I used a PhotoShop brush from Japanese Brush Pack 3 by darkgarden, to stamp the branch with the bird. You can find the brush set free here . The font for the text is LDJ Jilligraphy from Lettering Delights. You can find the link to Lettering Delights on my side bar.


     I zoomed to finish this up before her birthday because I've had a crazy week. I did get it delivered tonight though, phew!

Entered in the Sunday CAS Challenge at The Outlawz. Join us for the 1000 member Party going on this week!


     Many blogs are reminding you to schedule your mammogram, I'd like to remind you to have a colonoscopy, if you have a family history of colon cancer or are over 50. It's a screening test that can prevent cancer, though no one likes to think about the actual procedure >.< I finally had mine done and my husband goes next week, so if the shoe fits... so to speak ;- ) It can save your life or the life of someone you love <3 I have scheduled my mammogram too ;- ) 


Thursday, October 6, 2011

Join us over at The Outlawz 1000 Member Party!


Hey Crafters!
This is to let you know about the Outlawz 1000 Member Party!  This is one party you don't want to miss; the sponsors went way over the top with their super generous gifts! You could win a $100.00 gift certificate to Oozak or SCACD by playing the scavenger hunts! Or a gift certificate to 7 Kids College Fund, Ippity, or Gilli Stamps for participating in a fantastic tutorial blog hop! They also have Name that Tune, Word Scramble, and Bingo - each with its own prize, too!  Other sponsors include Whimsy Stamps, Make It Crafty, Color Me Creative Classroom, Paper Temptress, Pink Cat Studio, and Some Odd Girl! All your favorites and these aren't all of the sponsors! Come on over to check out all of the fantastic sponsors and their prizes!!
How can you win? Easy peasy!! Play the games, hop some blogs, and participate in their awesome challenges!  You have until October 9 at 11:59 p.m. EST to party with us! Hurry over! Just click here!