Showing posts with label Accent Essentials. Show all posts

Monday, March 12, 2012

Cocoa cards on their way to college ;- )

     Well, the cards have been on their way for a few days now, but my husband believes in sharing and shared his nasty cold virus with me (which may have some home from college in the first place with our son, but he doesn't usually get very sick.) There are 14 cards in total, but only 10 were still here for there photo shoot ;- ) The cards for the guys all use the same pattern paper, while I use a few different pattern papers on the ones for the gals.

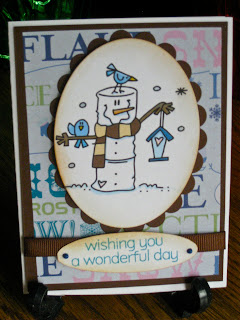
     The image is from Bugaboo Digi Stamp and I won it during a blog hop from Cely (Creating in Carolina) back during Christmas in July. I colored it digitally, which sure makes making multiples easy ;- ) and cut them out with the large oval nestability. The pattern papers are all from DCWV Holiday Collection Christmas Stack. The mats are a Bazzil paper from Archiver. The ribbon was scavenged from boxes of Godiva Chocolates over many years ;- ) (Yea! Hubby) I used Viva Decor Pearl Pens, to add the pearl dots, on the sentiment, which is from Hero Arts Big Hugs (stamped with Tumbled Glass Distress Ink and clear embossed) and also Sickles on the hearts for the gal cards, but only Stardust pens by Sakura to the hearts on the guy cards. Oh, and of course there is inking! The oval for the sentiment was cut on the Cricut using the Gypsy and Accent Essentials, after making sure the keep proportions was unchecked. A friend came over the first day and helped me cut our all of the images, mats, paper and card bases, so a special shout-out to Diana for her help!!!! Her daughter will get her card this week ;- )



     On the first cards, which went out before I took photos, I used pattern paper on the inside, but realized that the sentiment inside covered so much, that it was a waste, so I then just used more of the Bazzil card stock to mat the sentiment. The fonts in the sentiment are LD Penelope (from Lettering Delights) and Kingthings Christmas (the snowy font, available as a freebie Here or at dafont, but dafont was down for maintenance when I went to link to them.) I had added a post-it to the cocoa, because it required the addition of milk instead of water and I wanted to be sure they noticed that. I embossed a stamp from Inkadinkadoo's Warm Holiday Wishes with silver glitter finish.


     Sorry, about the photo, but the sun came out from behind the clouds and I usually photo after the sun is well past this window, but they needed to get into their envelopes. I created eveloboxes with The Ultimate Crafter's Companion for each of these cards (sorry, I didn't photo them), so there was enough room for them to fit. My son said his college treated his card like a package and sent him an e-mail when it arrived and he had to pick it up from the package person.

     Hope your week is full of inspiration and warm weather. We are expecting great weather here ;- ) Thanks for stopping by and I'd appreciating hearing from you! Your comments mean so much to me. Feel free to ask me any questions too!

Tuesday, March 15, 2011

More flowers...

     Today, I was able to get a new quilling board at Hobby Lobby and I found this product.


     DH had a 40% off coupon, as well, and this item cost $9 regularly. You get 120 die cuts to make into spiral roses and 80 die cut leaves. I thought for the time and paper savings, this was a good deal for me. I hadn't made the spiral roses yet, though they were on my list of to do flowers. Today was the day. The die cut sheet looks like this and the are 10 of them.


You get 3 sizes of flowers. Here is my result.


I used my quilling tool to form them and my Tweezer Bee to shape the petals.

     Next I got out my Flowersoft and made another flower I'd been meaning to try. I had purchased the supplies for this, sometime around Christmas. I decided to use the Delphinium Flowersoft on wires. Flowersoft TV has a special on Cardtoppers for Neon Flowersoft, which look pretty fun. You can find them here.  After you watch the show, you can click on offers, to see this week's deal. There is a new one every Friday.

I didn't have any styrofoam to stand them in to dry, so I improvised.


Here they are just lying on the craft sheet. I'm sure you'll see them in a card soon.

     I thought, OK, what now. I should make another flower, so I got some cuts I made with my Expression, when I first got it. When practicing on how to use the Expression, I used Accent Essentials and made flowers in different sizes and colors and stored them away for emergency, last minute card making. They have come in handy before. I have a number of sizes. These are 1 1/2  inches, 3/4 inches and 1/2 inches. I inked the edges and  I used a stylus to give them a 3D effect. I have in the past used the handle of a paint brush or the end of a pen cap to do this.  I curled the edges and added an embellishment.


     So there you go, 3 different homemade types of embellishments for you cards. You can, of course cut your own spirals for the roses, but some time savers, are what I need to actually get over some humps. Penny Duncan does have an SVG for the cut on her blog, as well, and that's the next weapon I'd use to get them made. Thanks, Penny!!!!!!!! ;- ) Maybe, quilling next, though I haven't made the paper rose from CHA (the Craft Hobby Association, winter show) yet. Thanks, for your time. Your comments are so very appreciated. Have a wonder-filled week.

Saturday, February 12, 2011

Valentine for a friend

     Today's card is my first easel card. I cut the base card stock at 11 x 4 1/4 inches. I then scored and folded it in half making it an A2 (5 1/2 x 4 1/4 inches). I then scored the front in half (2 3/4 inches) and folded the opposite way (up and out from the card).  I attached a piece of patterned paper from Paper Studio, to a piece of 5 1/5  x 4 1/4 white card stock, to make it stiff enough. This I then attached to the piece of the base that was folded out, attaching the folded piece to the top of the patterned piece. You might want to try the card closed and easeled before gluing, to be sure you understand the orientation of these pieces. That was the way it worked for me, because just looking at pictures wasn't enough.  I'll try to post a side view of the card tomorrow, so you can get a better view of that.

Here is the card easeled. (by the way I don't think that's a word ;- )

     The top heart was cut on the Expression using the Storybook cart at 2 inches, from pink glitter paper (use multi cut and raise your blade setting for this). The one underneath was suppose to be a shadow, but I used the dot feature key by mistake and it works. The second heart is from the Accent Essentials cart. The main image is cut from the red card stock and the main image with the shift key is cut from the pink glitter paper, also at 2 inches.
This is what the card looks like closed, except when it lies by itself it pops up a bit, so the ends don't seem to line up at the bottom, but they really do.

     On the inside, I used patterned paper from Paper Pizzaz, cut at 3 inches, at the top. I attached a piece of red card stock at the bottom, that I punched with a Martha Stewart punch and then I added pearls. I used pink ink to stamp  a sentiment to a piece of white card stock and then embossed it with clear embossing powder. The stamp was a $1 stamp from JoAnn's. I then added epoxy stickers from EK Success.  I printed my personal sentiment digitally and cut it with a scalloped oval nestability.


     What would I do different? Well, I'd meant to dry emboss the red paper on the inside and I think I'd still like to see that. Also I think I would have cut the inside red piece bigger, so that I could center the way the punches ended up better and the trim it to fit, instead of cutting first and then punching. I am really happy with the paper though. I'might have done the Happy Valentine's digitally, but I was trying to use 1 of only 2 stamps I have and the other didn't fit. Well, there you have it. I hope my friend likes it. thanks for spending your busy time with me. Let me know that you stopped by.

Tuesday, February 8, 2011

Fishing Card

     Well, the centerpieces are done, finis!  I wanted to post a picture of the teens with finished product, but I forgot to get permissions, so here is a fun photo of some of the vases.


     So, moving on, today I made a card for a friend's father, in his 90's. He is in a Nursing Home and enjoys getting cards and since he use to like to fish, I decided to make a nostalgic fishing card. It's an A2 card (5 1/2 x 4 1/4 inches), which I matted with a 5 1/4 x 4 inches piece of maroon card stock, that I embossed with the Sizzix Texturz Texture (I know it sounds redundant to me too) Plates Kit #2, design Diamonds after rounding the corners on the bottoms of both pieces. I then used the Expression with Accent Essentials cart to cut the Label shape at 3 3/4 inches. It's titled Shape #48 in the handbook and you use the shift key to get the filled in shape. The paper is Gartner Studios, BonVoyage - World Map, available from Hobby Lobby.  I made sure I featured the midwest, because that was where he lived. I did this by test cutting with typing paper and then just removing the cut image, without removing the mat, I had the blade return to the next line, and putting the piece I wanted to cut in place of the cut image with the area I wanted to be sure to showcase, showing through the hole. You should remove the typing paper at this point. I then moved the blade horizontally to the right and had it repeat last. The fishing boy is from  the Cricut cart, A Child's Year and is cut at 3 1/4 inches form Recollections Neutral card stock collection with a black shadow. I added the buttons, tied with doubled thread, since I couldn't find my black floss and the twine color I have doesn't go with the card.


     On the inside I matted it with black cut at 5 1/4 x 4 inches and patterned card stock from Recollections called Time Frame Second Hand Argyle Dark, cut at 5 x 3 3/4inches. I did the sentiment digitally using Lettering Delights's Shelly Script. The font is sized at a large 36 to help him read it. That piece is cut at 4 3/4 X 3 1/2. I stamped the 2 candles with a stamp from Hero Arts's set Cupcakes. The flames are colored with a yellow glitter Starlightz pen and a pinkish-red Gelly Roll pen at the center of the flame. The stripes on the candles are a peach colored watercolor pencil by Staedler. I used it just like a colored pencil though. It was the only thing I had to lightly color the candle in the colors of the card.


     What I would change? I'd remember to round the corners of the  black mat and the diamonds paper before gluing them together on the inside ;- )  I'm not sure about the buttons. They looked needed when I laid it out, but after everything was glued on I wondered if I shifted things and did I really need them. I do like the pattern on the big button, which is hard to see (maybe if you enlarge it.) It kind of matches the diamonds. I should have used card stock instead of printer paper on the inside, because I can see the pattern through it. I'll need to remember that next time. Well, thanks for looking and spending your limited time her. Let me know what you think!