Showing posts with label Watercolor pencils. Show all posts

Friday, July 1, 2011

Birthday Honey Pop card.

     Well, there was some struggle involved with this card and I'm not sure I'm really totally happy with it, but I'm out of time. Maybe part of it was due to the headaches, or the heat or my having been gone from the "drawing board" for so long, but this did not come together easy.  I planned on using a Penny Black stamp of a bunny in a flower pot of pansies. Many of you know the one I mean. Well, I have no art training, so coloring that would take me a lot of time, which I was now running low on, so I decided instead to use the Inky Antics set Cupcake Birdie which goes with there Honey Pop honeycomb papers (you will see them inside of the card if you don't know them.) I still needed to decide the layout for the front of the card and papers were a stumper until I decided to use this element from the Cricut Imagine cart Better Together.


     This bow is one of the Icons. Now soon you will be saying (as soon as you see the card), but Debbie, I don't see this element on the card. Aha, just one of the many twists and turns of this card. So, since I was going to use this element, I decided to use the papers from the Better Together cart. Suddenly, my Imagine turned against me and declared my ink carts were missing, not low, missing. After arguing with it, reseating the carts, disconnecting the power (that will teach it to argue with me) and reloading the software (including an update), it seems the stubborn machine still couldn't find what was obviously there! No time to deal with customer service,  I changed the ink carts and will look into it more later. Have you had this problem? Please leave me a comment.

     With sanity restored, (it's mine is gone) I came up with this. I'd give you cut sizes, but my way  wasn't the efficient way to make this, if you hadn't guessed that already. More changes were made. The bow was replaced with the flower which is from Creative Charms, (love this). I added clear glitter gel pen accents to the flower centers on the background paper. The front I do like.


     Now the inside... The example from the company, just shows it on the main card stock, so I wasn't sure how well it would work if I glued paper through the center (would it close right? be too stiff? etc.) and didn't have time for experiments, so just went with that. I find that a bit plain though. I cut the bird and the main cherry from watercolor paper, after coloring with watercolor pencils. The stamped cherries are colored with red sharpies (liked the bright red) and green glitter gel pens. The sentiment, which comes with the set, is embossed with clear embossing powder.


     So there you go, a crazy odyssey of creative (I guess that's what it is) misadventures. Is that redundant? Well, it's late. So, I think the inside needs work, but I'm happy with the front. Always room for improvement ;- )

     Oh! meant to mention that Enfys has Blog Candy on her blog here!!! Check it out ;- )

     Thanks for making it this far, if you have. Please leave me a note. I love to hear from you. Have a Blessed  and safe 4th here in the States and a wonderful weekend elsewhere. Wave your flag with pride!

Friday, April 15, 2011

Card for a friend.

     Today's card is for a friend who had foot surgery. Her son and mine became best friends in middle school and she was one of my son's teachers (part of the parochial school experience.) Her son is one of the college students to whom I send cards. This stamp set is part of the Honey POP sets that you can use the honey comb tissue paper with, though I didn't use the tissue paper cut-out here, because I was going to include a longer message and didn't want a pop-up. The images and the sentiment are all from the Carrot Bunny HoneyPOP Clear Set and you can find them on line at InkyAntics.com  The paper is Summer Song by My Mind's Eye. I really like how this turned out. I would think it was someone else's card, except the ribbon is crocked ;- ) When the Amish make a quilt, they always have a mistake in it, because they believe only God is perfect. I think this is a great way to create ;- ),  esp. since I'm a recovering perfectionist. It's a much less stressful way to live.


     The inside message was created digitally using Print Shop and 2 fonts from Lettering Delights called LD Soccer Mom and LD Wedding.


     What would I do differently? I guess I could have rounded all 4 corners, but I'm pretty happy with the way this turned out. Let me know what you think. Thanks for stopping by and sharing you thoughts and time with me. Please leave a comment if you have a moment, I'd love to know you were here. Have a blessed weekend!

Thursday, April 7, 2011

On the inside...

      Well, today I promised you the inside of the card I showed you on yesterday's post. The image and the font are from Birthday Bash. The sentiment is made to go with the cupcake and is the shift key for the cupcake image on the Birthday Bash cartridge. I re-cut the flame of the cupcake and replaced the green part. The 3 was the leftover cutout from cutting the balloon on the front.  I used divine swirls embossing on the cupcake. Now, here it is.


     I mentioned getting Lemon Flowers Stack by DCWV yesterday, but I hadn't taken any pictures. Today I thought I show you this lovely sparkly paper. Love the brightness!

Each print comes in different colors. For example the yellow one will also come in green and vice versa. The black and grey comes in a yellow and tan. The first, third and fifth (in the row above are glittered.) Click the photos to see them larger.

There are 4x6 mat stacks too.

This one has the same patterns only the prints are smaller to match the 4x6 size.

These are nicely textured, metallic or glittered. Again I found them for 50% off at JoAnn's.

     Thanks for stopping by today. Have a super weekend. We're expecting very warm temperatures here, of course that means storms as well. Please leave a comment if you have time, I really appreciate hearing from you and knowing you were here.


Monday, March 28, 2011

Bunny hopping for the guys.

     Well, I finished the card for the male college students on my list.  I basically just changed the colors on the front and used a different paper on the inside.


   Compare to the card for the gals from last post.


     If you hadn't read the earlier post, the pockets are for packets of Fun Dip. I've known these students since at least kindergarten. Most of them went to grammar school with my son.

     I thought I'd show you the background paper I made,  since you can't really see it with the images on the card. It's a great idea when you need paper and plain colored paper just won't do. Info in previous post (the boy's is gold perfect pearls however.)


     I've finished them all, up to the point of the water coloring. I have to mention that these Bugaboo bunnies are very mischievous. My husband cut out the bunnies (I was tired of cutting out black rectangles myself) and by the time he got upstairs to my craft room, 14 of the bunnies had disappeared. I know I had cut and scored all of the card bases ahead of time, so I could just assemble them all and when the time came, 5 bases were missing. I had the 2 1/2 inches of cardstock that was cut off of them, but they were nowhere to be found. <.< Very suspicious. I wonder were the bunnies put the cardstock and what they plan on doing with it?  Here is a photo of all of the finished cards together.


     Again, a special thanks goes to Creating in Carolina for the original idea. Today she has another cute card on her blog and a free jelly bean svg.  I'd also like to mention that Letraset is having a give-away, where you can win all 3 Promarker blending sets. Check out the details at this  Going Buggy post. Enfys always has some great inspiration on her blog too.

     Thanks for stopping by. Please, leave a comment if you have time. They really mean a lot. Have a week filled with joy and creativity!

Wednesday, February 23, 2011

The Guys Cocoa Packet Cards a Couple of Baptism Cards

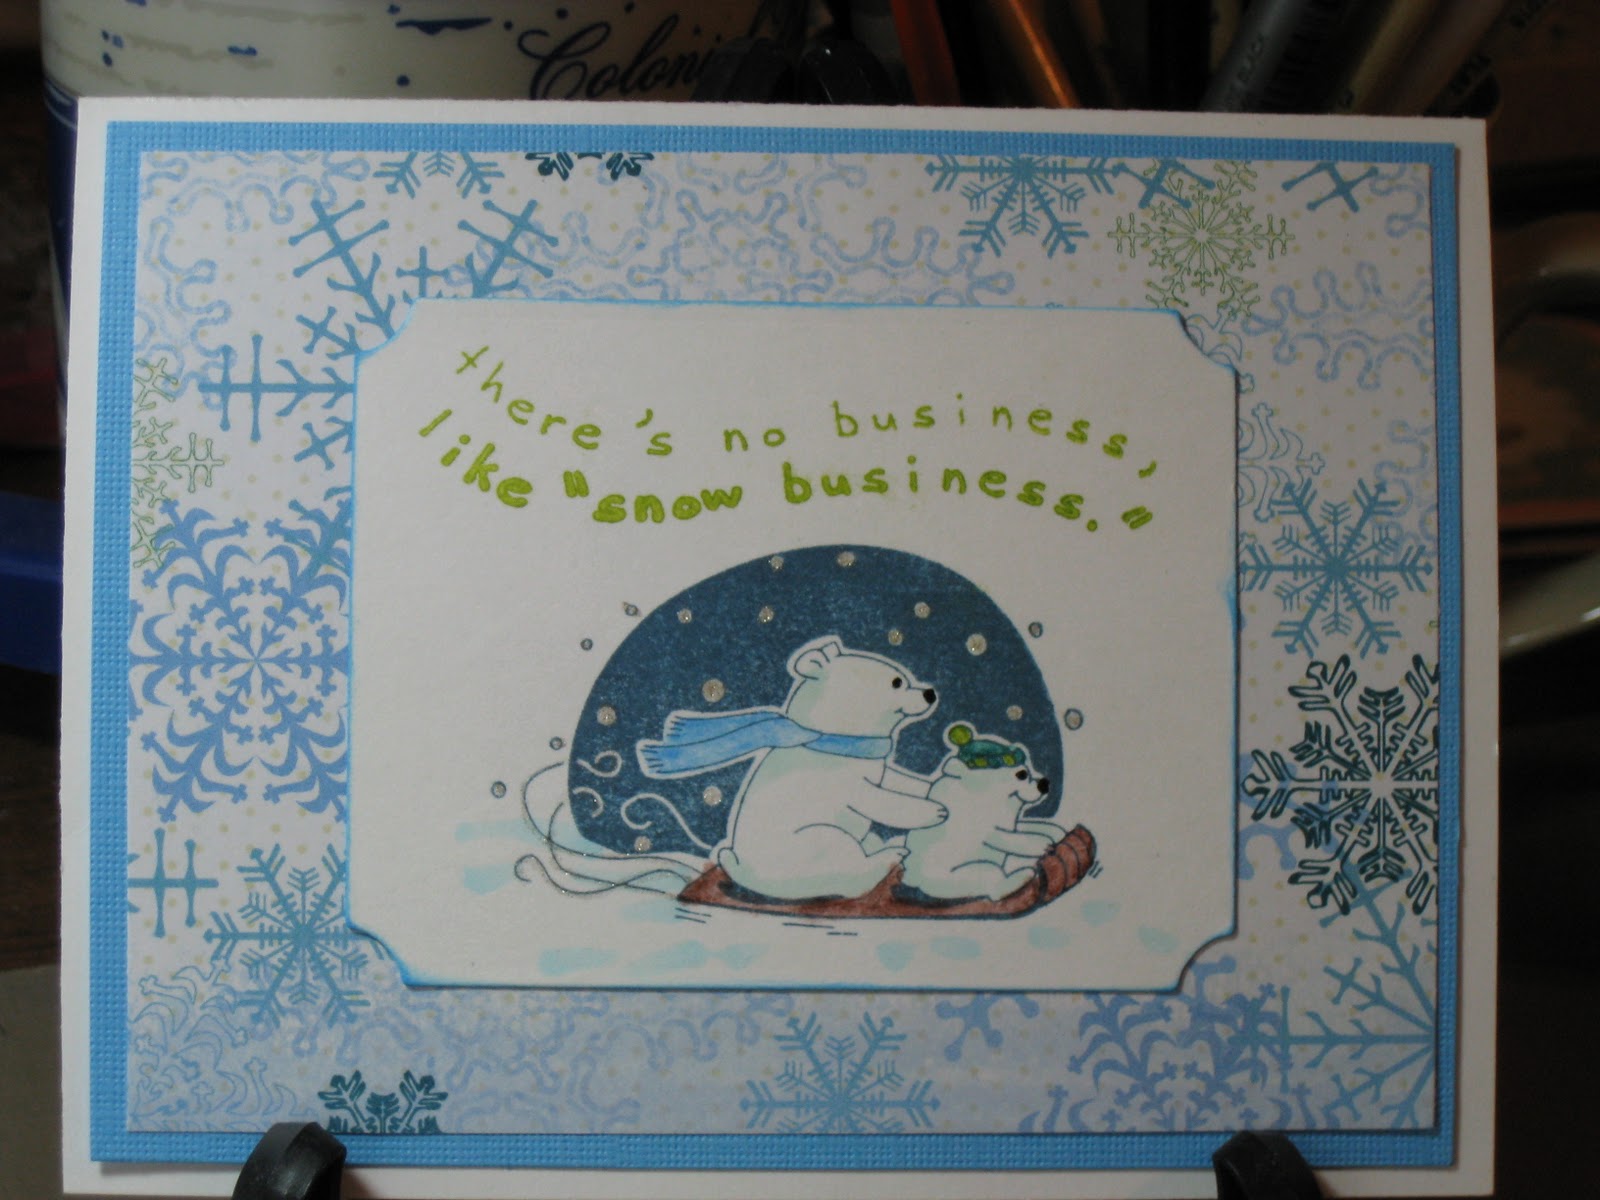
     Well, I had a productive day today. I went to lunch with a friend of mine to celebrate my birthday belatedly (my birthday is in December, but we had family medical things going on and it wasn't a good time). After she left, I started some laundry and headed up to the craft room. I worked on the male counter-part of the cocoa pocket card that a posted a few days ago. For this version I used a patterned paper from the DCWV Holiday Collection Christmas Stack. I used the same Inkadinkado Christmas Characters Stamp and colored it to match the paper, with Steadtler Watercolor pencils, Gelly Roll Clear Star for the snowflakes and trails behind the sled and a black glaze pen for the eyes and nose. I also used the same Copics BG10 on the bears and B00 to accent the snow and ground the image. The white rectangle was cut with a nestability. The sentiment was stamped with ink from Color Box's Petal Point Pinwheel collection. I also used the blue from the same collection to ink the sides of the white rectangle.


     Here are the two designs together.

If you'd like the directions for the cocoa pocket card, you can find it on the second post below this one.

     While ink was drying on this I worked on cards that I still needed to make for a gift for the Youth Director at my Church. If you've been following the saga since the beginning, I was making her some cards as a belated Christmas present (part of the December thing). The cards I've already given her are posted earlier on this blog. I asked her what else she could use, thinking I'd make her about 2 more cards and she said baptism, so today that's what I made. I think I might try to make her a couple of birthday cards, also, sometime soon. 
     The 2 cards I made are basically the same except for paper color and ribbon.  For the first one I choose green paper from Paper Studio's Pastel Cardstock Pack, cut a 5 1/4 x 4 inches and embossed it with Sizzix Divine Swirls. Next I added striped vellum cut at 4 3/4 x 3 /12 inches and added silver metallic dots to the corners. The green ribbon was some I picked up at Joanne's. I cut a scalloped oval with a nestie and stamped the wood mounted Stampabilities Ornate Cross on it with Big and Bossy, then embossed it with silver metallic embossing powder. I then added the oval popping it up. The oval was cut with a nestie also and stamped with Clear Stamps Wedding Congratulations in Dark Chocolate by PaperTrey Ink. It was double popped to go over the image. The inside is very basic for me. I just left if for her to write in. The butterflies were cut from some of the scraps with a Martha Stewart punch. 


     You see the yellow is basically the same, only embossed with Swiss dots and stamped with Summer Sunrise ink from PaperTrey. The ribbon is Best Occasions Self-adhesive Ribbon. 

     What would I have done different. The yellow one was actually done first and I realized that the vellum needed to be cut smaller, so I fixed that on the green one. On the green one, I had forgotten to add the ribbon and had to sneak it under after it was glued down, but it worked, phew!  I think the ribbon on the yellow is place to high. I like the placement on the green better. Well, we won't talk about how far the laundry got, but there is always tomorrow.
     Thanks for stopping by today and visiting with me. Leave me a note if you've got a moment more.  I may not be able to post on late Friday/Early Sat. because I will be picking my son up from college for his spring break. It doesn't seem like spring, but that's what the school calendar says. Maybe that's why so many of them go south, to find spring ;- ) Until next time then.

Saturday, February 19, 2011

Cocoa Pocket Card

     I have nine college students, who live away from home, that I try to send a little love. I planned for the next card to be a pocket card that would hold a packet of cocoa. (Who knew it would warm up in the midwest.) I looked around the internet, but most of  the ones I found were more box size, or just over size. I really wanted to stay with an A2 card, if I could, so I designed one my self. While choosing my papers, I realized I had 2 designs. One for the males and one for the females. Today, I show you the one I made for the females, since that's the only I've done ;- ) I have three to make for them.

     To start I  cut the paper 5 1/2 inches by 11 inches. Then I scored it at the 2 1/2 inch point and the 6 3/4 inch point. I then rounded the corners. The second photo shows how it will look when it is folded up.


     I then choose a pink paper from Paper Studios Pastel Cardstock Pack for the bottom mat and cut it to 5 1/4 x 4 inches. The next mat is a pattern cardstock with glitter and texture, that came from a JoAnn exclusive, they had the Christmas before last called Peppermint Forest. It was cut at 5 x 3 3/4 inches. I used my nestabilities to cut the large scalloped oval and stamped it, with the sledding polar bears from Inkadinkado's Clear Stamps Christmas Characters and also, the sentiment from the same set. The image was stamped with Papertrey's Enchanted Evening Ink and the sentiment with Colorbox's Enchantment Aqua Ink. I colored the snowflakes and the swirls in the image with Gelly Roll Clear Star. The clothing on the bears and sled were colored with Steadtler  Watercolor Pencils and also some highlights on the scarf with the Gelly Roll and the hat with a White Glaze Pen. The black on the bears (nose and eyes) is a Glaze Pen and a used Copic Markers BG10 to shade the bears and B00 to give some definition to the snow and add a base to the image. I also inked it with Broken China Distress Ink.


     On the in inside, I cut a different piece of glitter, embossed cardstock from Peppermint Forest for the front of the cocoa pocket. I planned the cuts to get the images from the paper. I cut a 1 x 2 1/2  inch rectangle of the pink paper, and rounded the corners. I then used my ATG gun to tape the sides of the pocket up. I used Versamark Dazzle and a small snowflake from the Inkadoo stamp set and randomly stamped the paper, then I stamped it with a sentiment from Hero Arts Big Hugs in Tsunkinako Black Ink. Each one of these cards is a bit different inside, due to the different characters on the paper. I didn't pop up the image on the front, due to the fact that the cocoa, already makes it tight in the envelope, however, on the inside I popped up the sentiment, since it's at the bottom and below the the bulge made from the cocoa. Unfortunately, I was out of 1/16 inch pop dots, but I'm thrifty, so I cut up the surrounding paper and used that. Shown below.


     The sentiment label was inked, except for one. That was the first one I put on when I was scrambling around to find my pop dots and so I forgot to ink that one. I get distracted by one thing and forget what I meant to do, hate that.  I decided I should make tags to go in the pockets with a personal note for each one. I stamped a tag with Big and Bossy using a grouping of snowflakes stamp and filling in with the small snowflake stamp and embossed it with White Embossing Powder. My plan was to spritz it using a mini-mister filled with Turquoise Perfect Pearls, water and Broken China Re-Inker. I found that one of my mini-misters is not a mister but a mini-jet sprayer! Well, that was interesting. I dealt with that and the first tag, which is too dark, but I'll live with it . I filled a new mister and did the other 2 tags and also added Worn Lipstick Distress Ink to the tags and wiped off the excess from the embossed areas.
I added Martha Stewart twine and will write a note on the back of this one and creatively on the front of the others.


     So, there you go, 3 card down and 6 more to go. They will probably be basically the same, but with different papers, but who knows. We will see where creativity leads that day. What would I do differently? Well, I am thinking of looking for snowflake buttons for the front yet or buttons in coordinating colors. With a total of 9 cards I didn't want to get too detailed or difficult.  I think I might have papered the inside of the pockets. I also might have embossed 1 or both of the sentiments, again trying to keep it fast. Thanks for coming back and looking. Drop me a word about how you see things.