Showing posts with label Divine Swirls. Show all posts

Thursday, October 27, 2011

     Phew, all 14 cards for my college students are done ;- ) My sofa is covered in glitter and snippets of paper, ha ha, but 5 made the mail and the others are stamped (1 awaiting a mailbox number.) I believe last year when I originally CASEed the one from Creating in Carolina I did them one at a time on the Expression. This year, I decided to move her SVG file onto separate layers so I could cut multiple of each item at 1 time. Here is the link to Cely's original post with her file. I made the card an A2 which makes the mouthes kind of small, so I thought I'd gotten rid of them all, but it still did the cut outs on the pumpkin. (Last year the pumpkin face was drawn in, no time for correcting mistakes this year. I'm down to the wire!)  I used Diamond Lace sickles on the moon, gel pens on the eyes, Crayola Pip Squeak glitter for the pumpkin mouth and Divine Swirls to emboss the background.


     The poem (which I showed on an earlier post) was one I found and modified. These are mostly students (trying not to call them kids ;- ) from my Church, who also had attended our K-8 Lutheran School, so I took the witch out of the poem. Yes, I know there is a ghost on the card, but he isn't doing sacrifices in the local forest preserves! You have to draw a line somewhere. Fonts are Lucinda Blackletter and LD Typset (the latter from Lettering Delights.)


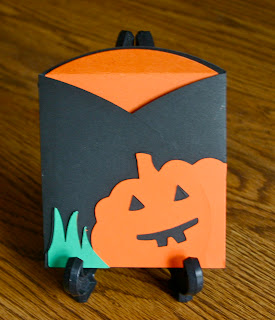
     The card for my group that got this one last year, is the one that I teased you with. It is from... the Wild Card cartridge. It is cut at 3.75 inches on the Expression. I used my Gypsy, because the way Cricut designed it, the orange layer is the same as the black layer and you cut the square off and just use the pumpkin part of the cut. Too wasteful for me, so I used the Gypsy to overlay the cut, putting the next pumpkin on top of where the square would cut, continually overlapping the cards until the mat was full. This way I didn't waste so much paper. What was I going to do with a bunch of 3 3/4 inch squares of black paper anyway? I used spray glue on the "Boo" elements and then sprinkled Martha Stewart glitter on them. I colored in the eyes and mouth with yellow glitter gel pen.


     On the inside, I wrote with white gel pen. Font, debbie scribble, hee hee.

    
     There was also and envelope available with a liner. At first, not knowing the mailing code I thought I could use it. I made my son's in black however, because it's Family Weekend and I thought I'd just sneak his onto his desk. Later realizing my error (somewhere along the way, when my better judgement kicked in about mail codes) I decided that I would put the cute, small, decorative envelope into a normal A2 size envelope for mailing everyone's cards. On the white ones, I just went over the pumpkin with Marmalade Distress Ink.


     Here is the whole bunch, done, just before I noticed I only had 6 A2 envelopes left in the house and still had to call and get updated addresses for the students from last year and addresses for some of them for this year :- 0

Should have set them up better, would have if there was TIME! ;- )

     Thanks for stopping by and listening to my tale of woe. Hope you have a great weekend. Still so much to do before my husband's surgery and he's out of commission for at least 4 weeks. Please leave a comment, because they mean so much to me. It will be a great weekend, because I'll be seeing my son!

Friday, August 5, 2011

Creating the Mystical Unicorn

     Today's card is for a little girl who is turning 5. Her favorite animal is the unicorn, so I decided to make it a shaped card. I used the unicorn from the  Cricut Paper Dolls Dress-Up cart. It's from the page with the pixi, I believe it's the 13th image. You're saying pixi? I know that's what I said, but I was just glad to have a unicorn. (I, too, thought it would be with the princess.) I used my Gypsy to make it a shaped card welding two unicorns (one flipped) with a small rectangle from Accent Essentials. I used pearlized cardstock  from Crafter's Companion, for the base because they have a nice sturdy cardstock (love this stuff) and I thought the pearlized finish made a nice card. I cut another unicorn  from white cardstock (hiding the eye cut - because I was going to use the gem, and some other cuts - I would have the Cricut draw) and before removing the mat (using the Gypsy) selected return to program, selected the parts I wanted drawn, replaced the blade with the Cri-Kits gel pen and selected cut again and added the lines to the unicorn. I re-cut part of the unicorn again using scrap paper with black Core'dinations where the hooves would be cut and stopped it after it cut the hooves. I was going to do the same for the horn with glitter cardstock, but decided to embossed it instead with an embossing pen and Kaleidoscope embossing powder. The mane and tail were embellished with Sparkly Fluff. I added a gem for the eye and the flower is from Creative Charms. The font is from the Storybook cart and welded on the Gypsy.

 Click photo for close-up, to see details

     I used Martha Stewart's circle cutter, to cut the circle, at 1 1/2 inches and embossed it with Divine Swirls.  I then inked it with Studio G chalk ink. The 5 was cut from the Storybook cart and they were popped up. The sentiment was made digitally and the fonts are Happy Birthday in Storybook and LD Farfetched for the rest, which is available from Lettering Delights (see the link on my sidebar - they also have graphics,  and SVG's .)  The hearts are Rain Dots from Cloud9 Design which is a Fiskers brand. and were a bit too peachy, so I colored them a bit with my Copics. The sentiment and it's mat were cut with nestibilities. This was popped up also, but not as high as the circle with the 5.

Click for a closer look.

     What would I do differently? I thought about putting a gold ribbon around the neck of the unicorn. I looked up photos and none of the unicorns had anything around their necks, except some had flowers. I guess you can't rope a unicorn ;- ) While doing this, (and I had suspected and was checking this also, but had already done the hooves) I noticed that none of the unicorns had black hooves (ok 1 or 2 may had), but white or pink ones. At this point, my son said to me, "Mom, unicorns aren't real. You can make them look any way you want!" These are the type of perfectionist details I'm suppose to be recovering from ;-) 
Later, when I was done I thought a dusting of Perfect Pearls over the body might have been a nice touch too. So these are some ideas for another time. I do think she will really like her card.

     Thanks for stopping by. Hope some of you are getting some cooler weather. We finally are. Who would have thought mid-80's would have been cooler ;- ) The front going through took my migraines with it, so good riddance. Please leave a comment. It just takes a moment and I really appreciate knowing you are out there. Have a wonder-filled weekend.


Sunday, July 31, 2011

Two quick cards

     Well, I was down to the wire on two cards. It was a busy week and then I hadn't been feeling well, causing me not to get these two cards done earlier. So, here I was needing to get them done, before the mail carrier got here. Fortunately, I had a few tricks up my sleeve. I had picked up some note cards from Studio g in the Dollar Bin at Michaels', that had pre-cut windows. I'd also had on hand an assortment of embellishments that I've picked up over time, when there have been sales at Michaels' and JoAnn's. These are from JoAnn's Craft Essential 's line.  The front is embossed with Divine Swirls. The stamp, showing through the window of the anniversary card, is from Stampabilities. It was stamped with Big and Bossy and embossed with gold metallic embossing powder. Hint: Use a dryer sheet to wipe the area where you are going to emboss before you stamp to reduce the amount of powder that clings to unwanted areas. I wish I would remember this the ahead of time, every time ;- ) I colored it with both yellow gel and yellow glitter pens to make a champaign look and went over the glasses with Diamond Glaze.  Used my heat tool to speed drying.


     The inside sentiment is from Inkadinkadoo.


     The birthday card follows the same formula, only the stamps are from Hero Arts, made for Archiver. I embossed it with Swiss Dots.  Hint: I had to run it through twice and doing this would cause a section of the dots to de-boss, so I lined it up, to be the area where I would put my sentiment/embellishment. Always plan ahead - an interesting concept for me ;- ) OK, it was a happy accident the first time, but my pickiness, made me do this one a second time and I did it intentionally that time, so there!


It's really more red and maroon than pink.

     For quickie cards, I think they turned out pretty good. Kind of like the less expensive line of cards, but still with that homemade touch. We all have those times when we are out of time. The anniversary couple's daughter has a birthday this week and I need to make a unicorn card for her. So, they will get the full custom treatment then ;- ) As it turned out, it was good they were fast. I didn't just have to beat the mail carrier, but get to the post office before it closed, because I was out of stamps and traffic was horrendous because of a parade. Some days nothing is easy ;- )

     Thanks for stopping by, during your busy summer (if your north of the equator, like me.) Please leave a comment because the fuel me. Have a Blessed Sunday!

Thursday, April 7, 2011

On the inside...

      Well, today I promised you the inside of the card I showed you on yesterday's post. The image and the font are from Birthday Bash. The sentiment is made to go with the cupcake and is the shift key for the cupcake image on the Birthday Bash cartridge. I re-cut the flame of the cupcake and replaced the green part. The 3 was the leftover cutout from cutting the balloon on the front.  I used divine swirls embossing on the cupcake. Now, here it is.


     I mentioned getting Lemon Flowers Stack by DCWV yesterday, but I hadn't taken any pictures. Today I thought I show you this lovely sparkly paper. Love the brightness!

Each print comes in different colors. For example the yellow one will also come in green and vice versa. The black and grey comes in a yellow and tan. The first, third and fifth (in the row above are glittered.) Click the photos to see them larger.

There are 4x6 mat stacks too.

This one has the same patterns only the prints are smaller to match the 4x6 size.

These are nicely textured, metallic or glittered. Again I found them for 50% off at JoAnn's.

     Thanks for stopping by today. Have a super weekend. We're expecting very warm temperatures here, of course that means storms as well. Please leave a comment if you have time, I really appreciate hearing from you and knowing you were here.


Wednesday, February 23, 2011

The Guys Cocoa Packet Cards a Couple of Baptism Cards

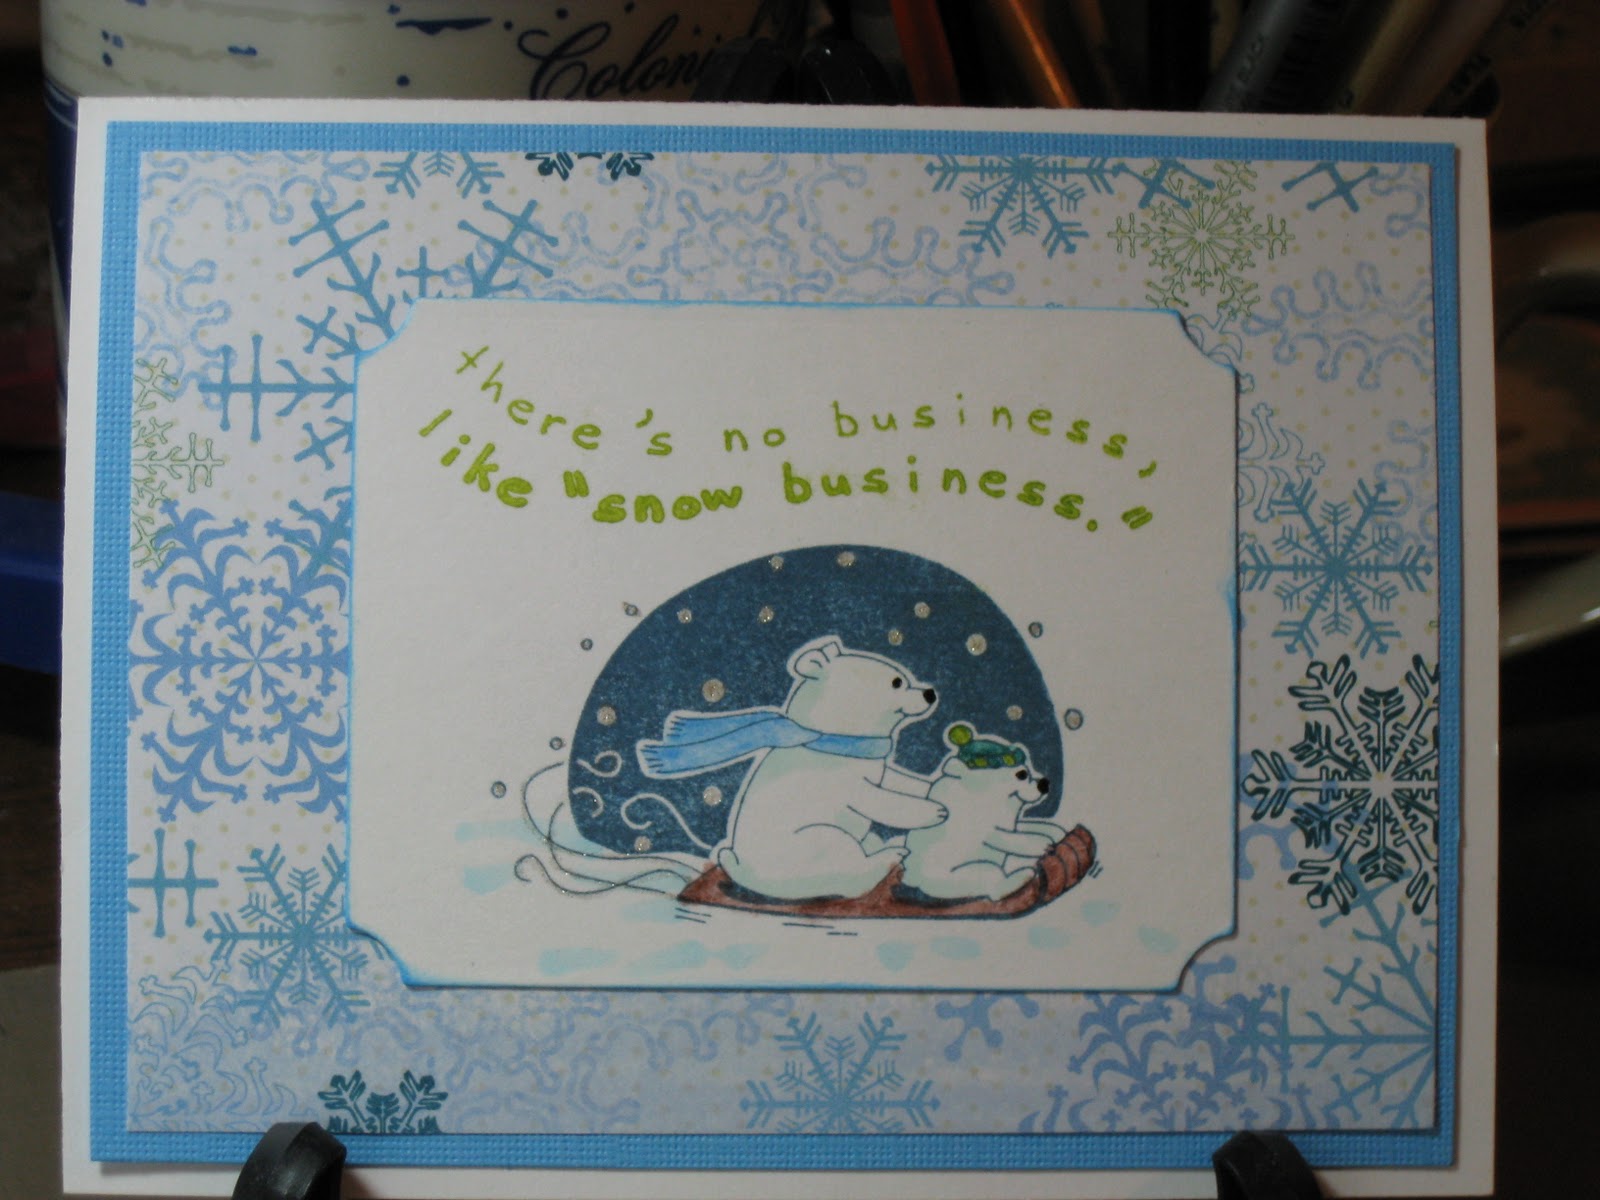
     Well, I had a productive day today. I went to lunch with a friend of mine to celebrate my birthday belatedly (my birthday is in December, but we had family medical things going on and it wasn't a good time). After she left, I started some laundry and headed up to the craft room. I worked on the male counter-part of the cocoa pocket card that a posted a few days ago. For this version I used a patterned paper from the DCWV Holiday Collection Christmas Stack. I used the same Inkadinkado Christmas Characters Stamp and colored it to match the paper, with Steadtler Watercolor pencils, Gelly Roll Clear Star for the snowflakes and trails behind the sled and a black glaze pen for the eyes and nose. I also used the same Copics BG10 on the bears and B00 to accent the snow and ground the image. The white rectangle was cut with a nestability. The sentiment was stamped with ink from Color Box's Petal Point Pinwheel collection. I also used the blue from the same collection to ink the sides of the white rectangle.


     Here are the two designs together.

If you'd like the directions for the cocoa pocket card, you can find it on the second post below this one.

     While ink was drying on this I worked on cards that I still needed to make for a gift for the Youth Director at my Church. If you've been following the saga since the beginning, I was making her some cards as a belated Christmas present (part of the December thing). The cards I've already given her are posted earlier on this blog. I asked her what else she could use, thinking I'd make her about 2 more cards and she said baptism, so today that's what I made. I think I might try to make her a couple of birthday cards, also, sometime soon. 
     The 2 cards I made are basically the same except for paper color and ribbon.  For the first one I choose green paper from Paper Studio's Pastel Cardstock Pack, cut a 5 1/4 x 4 inches and embossed it with Sizzix Divine Swirls. Next I added striped vellum cut at 4 3/4 x 3 /12 inches and added silver metallic dots to the corners. The green ribbon was some I picked up at Joanne's. I cut a scalloped oval with a nestie and stamped the wood mounted Stampabilities Ornate Cross on it with Big and Bossy, then embossed it with silver metallic embossing powder. I then added the oval popping it up. The oval was cut with a nestie also and stamped with Clear Stamps Wedding Congratulations in Dark Chocolate by PaperTrey Ink. It was double popped to go over the image. The inside is very basic for me. I just left if for her to write in. The butterflies were cut from some of the scraps with a Martha Stewart punch. 


     You see the yellow is basically the same, only embossed with Swiss dots and stamped with Summer Sunrise ink from PaperTrey. The ribbon is Best Occasions Self-adhesive Ribbon. 

     What would I have done different. The yellow one was actually done first and I realized that the vellum needed to be cut smaller, so I fixed that on the green one. On the green one, I had forgotten to add the ribbon and had to sneak it under after it was glued down, but it worked, phew!  I think the ribbon on the yellow is place to high. I like the placement on the green better. Well, we won't talk about how far the laundry got, but there is always tomorrow.
     Thanks for stopping by today and visiting with me. Leave me a note if you've got a moment more.  I may not be able to post on late Friday/Early Sat. because I will be picking my son up from college for his spring break. It doesn't seem like spring, but that's what the school calendar says. Maybe that's why so many of them go south, to find spring ;- ) Until next time then.

Wednesday, January 19, 2011

Birthday card for a Friend

     Today's card is a more typical card for me. It's for my friend Gywn. Typically when I make a card for a friend I try to tie it to that person. I don't make many general cards. In this case the image will be a penguin, because Gwyn has often considered that her symbol. She uses the word penguin to tell people how to pronounce her name, so that they don't mispronounce it Gwen. So it's convenient that she has a January birthday. Let me show you the card and then I'll tell you how I made it.


     I used the penguin from the Cricut Create A Critter cartridge. I cut the penguin with the layers at
2 1/4 inches on my Cricut Expression. I used the Gypsy to lay the whole card out first to make sure the words would fit in the space of an A2 card. After I had all of the penguin layers set out, I choose the phrase, "chillin'" from the same cartridge. I sized it at 2.5 inches wide and it was cut out of the DCWV Holiday Collection Christmas Stack. I realized it would be too similar to the background paper and since it was already the shadow cut, I made a second cut out of black and sized it 1.45 inches high. The original cut was 1.35 inches high, so I went up one tenth of an inch to make  the background cut. Due to the fact that the cuts are curved, it's not really a shadow, but I placed it so that it shadows as if the light were below it. I used the Cricut cart Lyrical Letters to type out "on your Birthday" at 1 inch high on the Gypsy and then welded the letters of each word except for the B. I tried the letters smaller, but the smaller letters didn't cut well, esp. welded. The orange cardstock is from Cord'inations. the rest was scraps, so I'm not sure. I used a pearl gem to dot the "i".  I used the Cuttlebug Divine Swirls folder to emboss the background layer with my Big Shot. I embellished the "chillin'" with Diamond Stickles, even adding icicles. here is a close-up.


     I had meant to try the icicles before the card was put together, in case they didn't work out, but as usual, I forgot my smart idea and had the whole thing put together first. Still, I tried my icicle idea and was happy with the way they turned out. On the inside, I matted 2 pieces of patterned paper from DCWV Holiday Collection Christmas Stack  (one at 5 1/4 x 4 and the other 5 X 3 3/4) and added the birthday wishes which I had done on my computer using Print Shop. The fonts I used were Snowcaps by Simply the Best Fonts and SNF Jester Play by ScrapNfonts. Snowcaps is a free font and SNF Jester Play is currently $5, but they often have sales and I think I got it for $1 or $2. I then added  a cute penguin dimensional sticker from Recollections and an epoxy bubble icon from Craft Essentials. What would I have done different? I had meant to tear some white paper to look like a snowy base for the penguin on the front to stand on to ground him, but forgot. I probably would have used Stickles on that as well. Otherwise, I'm pretty happy with the way this card turned out.
     I've been asked by a friend to do a card for a 100th birthday. Time to put my thinking cap on. If anyone has any ideas, please chime in. Thanks for looking in.